
Today’s 5-step intermediate-level Tutorial Tuesday can work in a number of different design softwares, so we focus on the basics of how the design is created. Let us know how it works for you!
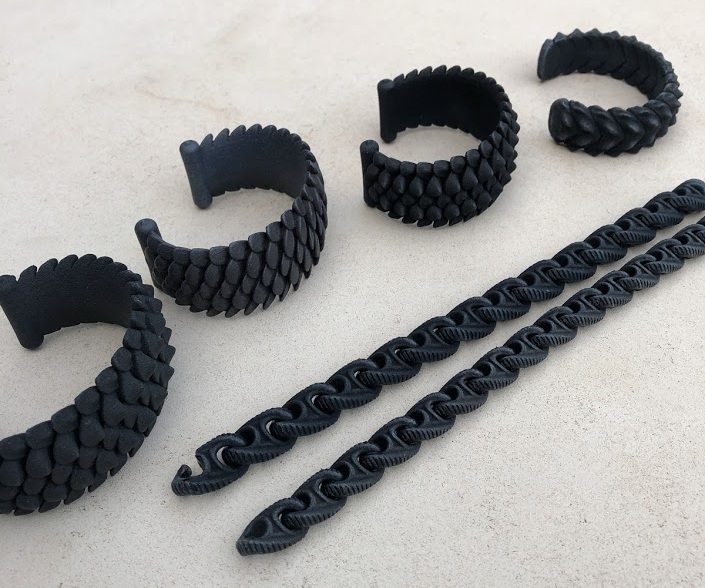
Worry beads are the original fidget spinner. Bracelets made from worry beads were invented by the Greeks to help to pass the time and keep nerves at bay. Now, Gordon Lardi, a designer and engineer, has created an all new set of rope-like worry beads using SolidWorks (Note: you can use any parametric modeling program to create this design, for free options try Fusion360 or OnShape) and Strong & Flexible plastic. Using the iterative design process, Gordon discovered that his design had a super-satisfying “fidget bead” quality. Learn how to create your own in Gordon’s simple 5-step tutorial.
Step-by-Step Interlocking Bracelet Tutorial
By Gordon Lardi
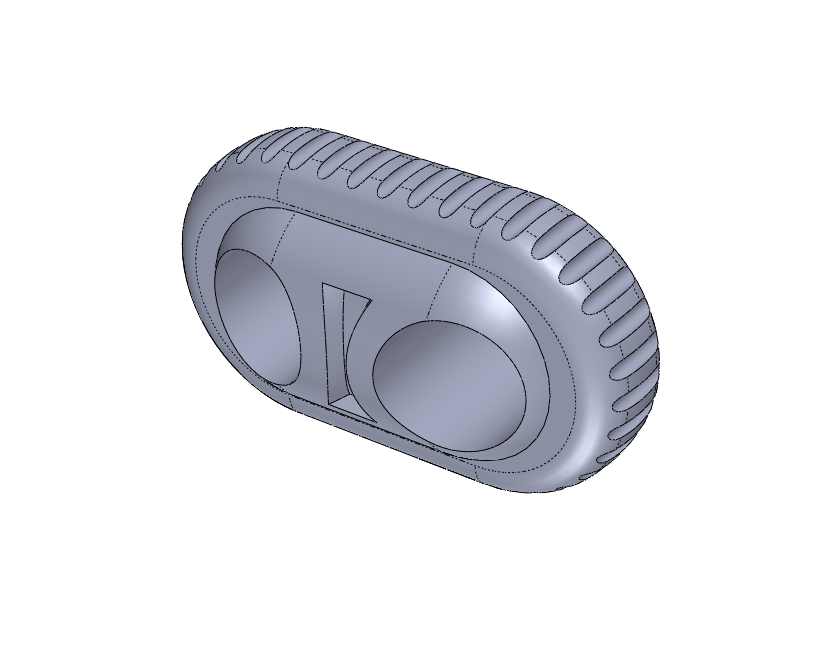
Step One: Design a single bracelet link.
Lardi has used a capsule shape for the individual beads in order to give the bracelet some weight and depth. From the first step in the tutorial you will notice the need for parametric modeling software (SolidWorks or Fusion360). These tools allow you to easily go back and edit dimensions where needed without having to redesign the entire bead or bracelet.
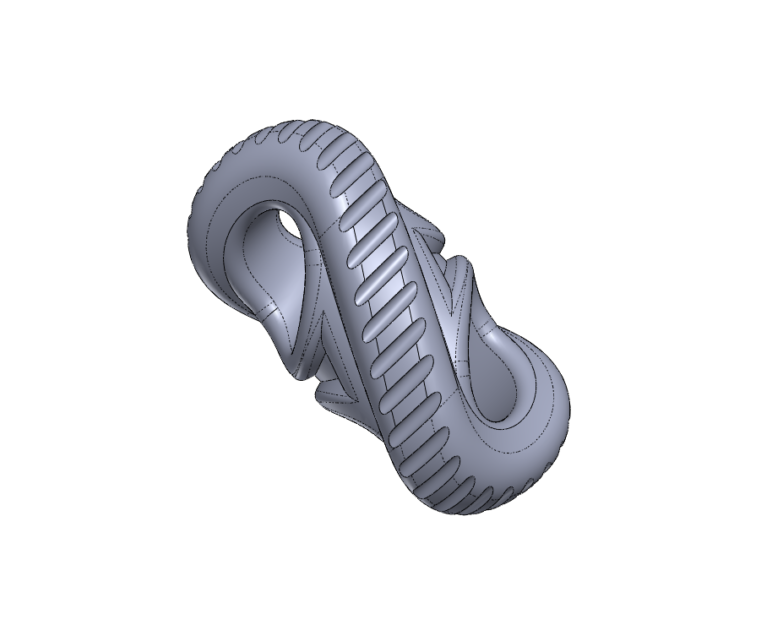
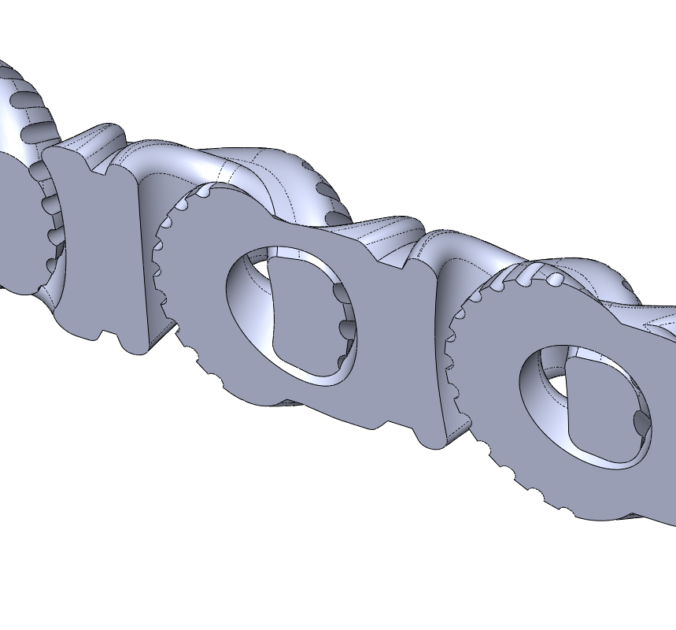
Step 2: Twist single link.
Flex the entire body of the bracelet link to give the bracelet the rope twisting appearance. When twisting the bead in this way, you may reveal sharp edges. At this step you will want to fillet or round off those sharp edges.
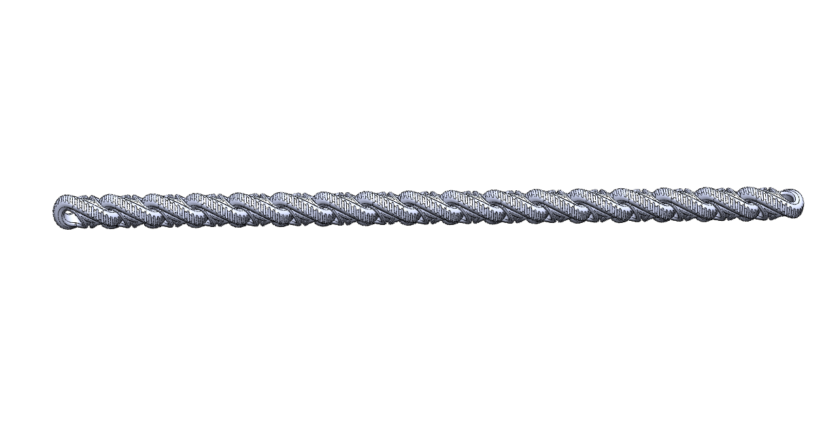
Step 3: Create chain of links.
Now that the bead is complete, create a linear pattern of the links to create a single bracelet. Set the number of links appropriate to your desired bracelet or chain size.
Step 4: Check how your links fit.
Inspect the chain by temporarily splitting the design in half. You want to make sure that your links are not touching or are too close to the connecting link. This will ensure that while your chain is printing, the links do not fuse together. Lardi recommends that you at least provide 0.5mm – 1mm of clearance.
Step 5: Create Fastener
The final step in creating the rope bracelet is designing the hook or fastener. Lardi was looking to create an “uninterrupted rope appearance,” so he developed a final link that would blend in with all of the other links. Lardi designed a snap on hook by trimming the opening slightly larger than the width of the link. This would allow the hook to easily snap on and off.

Once the initial design was complete, Lardi ordered a prototype of the design in black Strong & Flexible nylon. Using the iterative design process, Lardi ordered the design three times with slight dimensional changes in between to get the design and fit just right.
ready? print your design
With the final product received, Lardi discovered an unintended, fidget-like quality to his design. Each of the links snap into a S like pattern, much like the worry bead.
Thanks for sharing my tutorial, here is a link to the bracelet for sale at my Shapeways Store “Rip and Shred”.
https://www.shapeways.com/product/BJSRZE8W8/s-chain-bracelet-8-75in-long
Very interesting tutorial Gordon!
Bracelets are often made from steel or precious metals like silver or brass. So there’s a huge potential for 3D printing in this market.
However, designing and 3D printing an affordable bracelet in of these metals is quite challenging.
Which interlocking bracelet designs suitable for 3D printing in steel, silver or brass do you think are possible?
For this particular design i believe the most feasible material would be Aluminum since it is laser sintered in a powder support much like the Strong and Flexible Plastic.
Did u use Fusion 360 for the design? If so how did u twist/bend the link using that software?