
One of my favorite things about 3D printing my jewelry designs with Shapeways is how easy it is to experiment with different materials to determine which characteristics best serve a particular design.
In this post, I’ll lay out an easy approach for creating the Simplest Hoop Earrings Ever. This minimalist style is already trendy in its own right, but it also serves as a great foundation for personalizing the design with digitally sculpted details, 3D printed dangling charms, or anything else you can imagine. And I used Rhino, but you can follow this recipe using any 3D modeling software.
Consider the classic hoop earring:
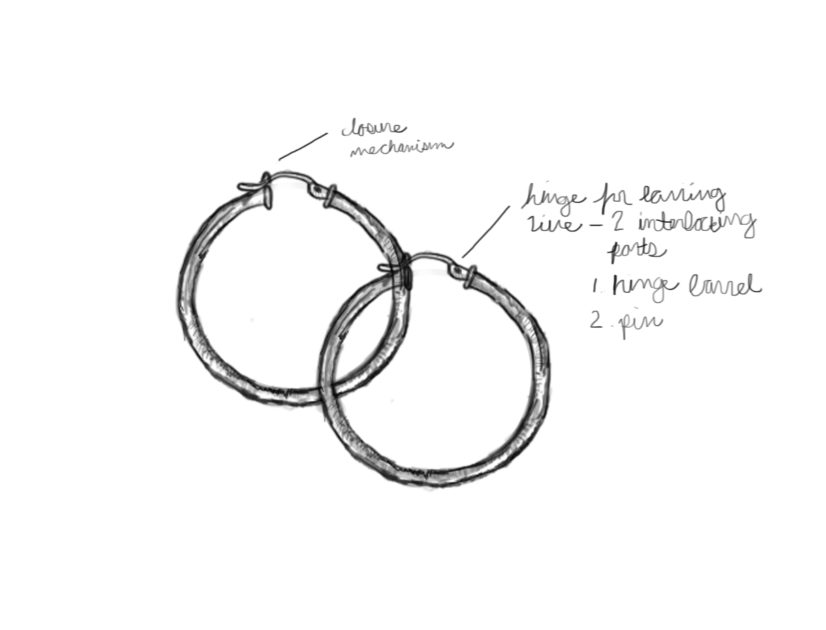
If we were to 3D model the seemingly simple hoop earrings shown above, we would probably need several rounds of prototyping to get the hinge and clasp to function as planned. And if we were planning to 3D print the hoops in a more rigid material like Frosted Ultra Detail or Strong & Flexible plastic, there would be no choice but to keep iterating until we got the right fit.
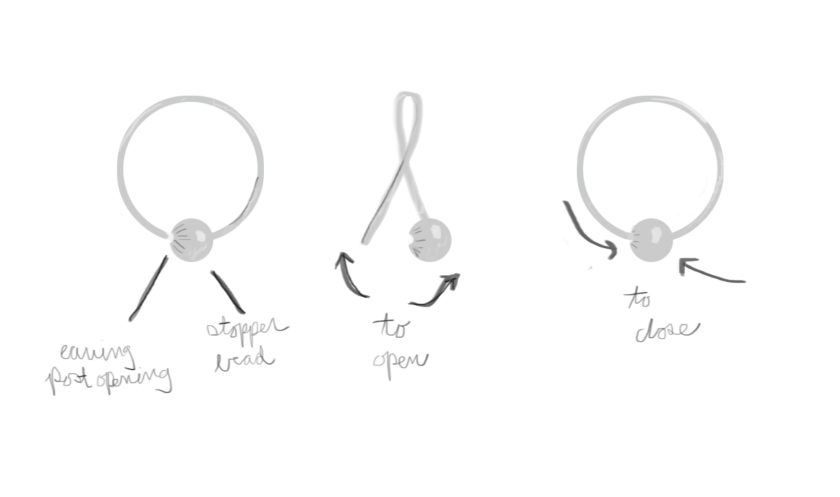
This next point may seem obvious to a trained jeweler, but I was glad to learn firsthand that creating jewelry in a pliable cast metal such as raw brass, bronze, or silver allows a piece to bend into and out of place without a complicated closure. So these 3D printed hoops are a simple, hinge-free design, comfortable enough to wear everyday — and to sleep in without them getting tangled in your hair.
Step 1
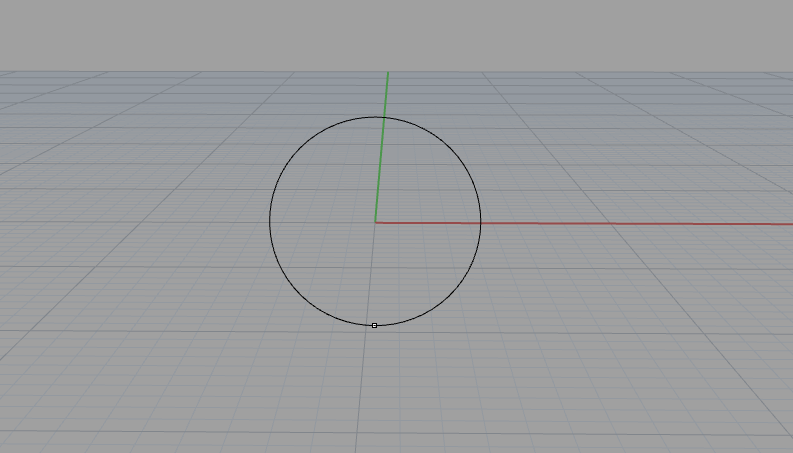
We’ll begin by creating a circle to establish the size of the hoop. I gave mine a 9-mm diameter, but you can make yours any size you like. Then mark the midpoint at the bottom of the circle to establish where our stopper bead will go. If you’re using Rhino, I recommend using the Point command.
Step 2
Next we’ll create the stopper bead by building a sphere at the midpoint we just drew. The size of the sphere is up to you; I gave mine a 3 mm diameter.

Step 3
Then split the circle using the sphere as a cutting object. The resulting shape should resemble the yellow curve in the screenshot below.

Step 4
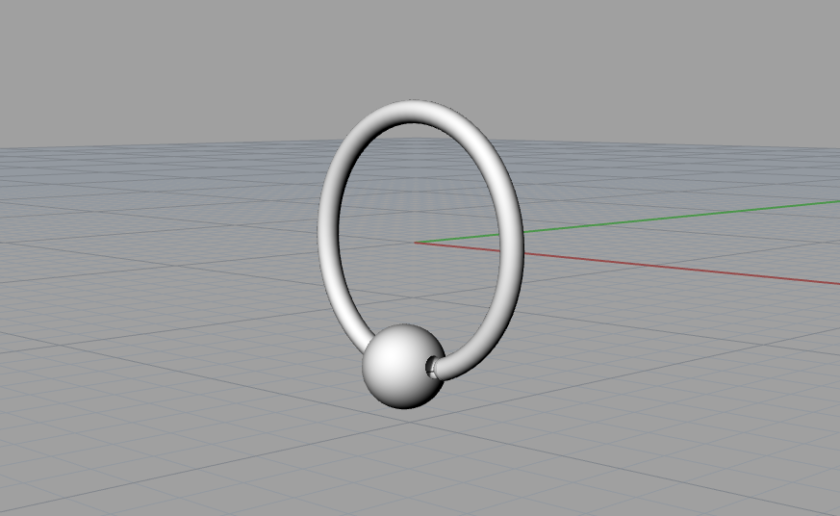
Now we’ll add some mass to our hoop. In Rhino, you can select the hoop curve and call the Pipe command to create a solid tube shape with a diameter of .8 mm. Make sure you select a rounded option for optimal comfort, since one end of the tube will thread through the piercing. In Rhino this can be done by selecting Round from the Cap dropdown.

Step 5
Next, we’ll use our newly formed hoop to serve as the positive for carving a tiny notch into our stopper bead. In Rhino, we’ll use BooleanDifference (other programs call this Boolean Subtract) to cut the shape of the hoop out of the sphere, leaving a small indentation to hold the earring post in place.
Once this is done, when you select the stopper bead you should be able to see the negative space for the earring post.

Step 6
To make sure our hoop model doesn’t fuse closed during printing, we’ll have to move the stopper bead ever so slightly to either the right or left. For Shapeways brass, bronze, or silver, the clearance should be .4 mm, so I moved my stopper bead .5 mm to the left to be safe. (If you’re planning to print your earrings in another material, make sure to consult the material guidelines and design accordingly.)
![]()
Step 7
Now we’ll join the hoop to the stopper bead by selecting both objects and using the BooleanUnion command.
Step 8
The final step is to create a mesh. I used Rhino’s default mesh settings, with the slider all the way over to More Polygons.

Do you know any clever ways to incorporate material characteristics into your designs? Share your ideas in the comments!
Nice idea. But as a goldsmith I have to say, 0,8mm diameter for the tube is extremely fragile, especially when cast.
If you bend it a few times too often, it will definitely lose its round shape or may even brake because of the material getting brittle.
Great tutorial! I’ve had this ball design work out before, from this design made in OpenSCAD:
https://www.shapeways.com/product/QS57NJTJH/hoop-knot-earring
I have to agree that 0.8mm might be too thin, at least in Polished Silver; my first test print was 1.2mm across (seemed like more like 1.0mm after polishing?), and it is so bendable that I worried that it would get smushed and pinch my ear. I’m waiting on a second test print now that I sent at 1.4mm diameter, in the hopes that it would come back as 1.2mm and be a little sturdier.
Do you happen to know if the Rhodium or other metals would be less fragile/flexible than the Silver? And if they are ok to put in your ears?