Clear Ultra Fine Detail Plastic

1:32 Albatros D.V/a Fuel Tank (WNW drop in)
Made by
Print With Shapeways
 Choose Your Material
 Choose your color and finish
$1,799.03
Have a question about this product?
contact the designerYou must be logged in and verified to contact the designer.
Product Description
This item is available for $18.00 on Aircraft in Pixels with dicounts available on my Patreon Page.
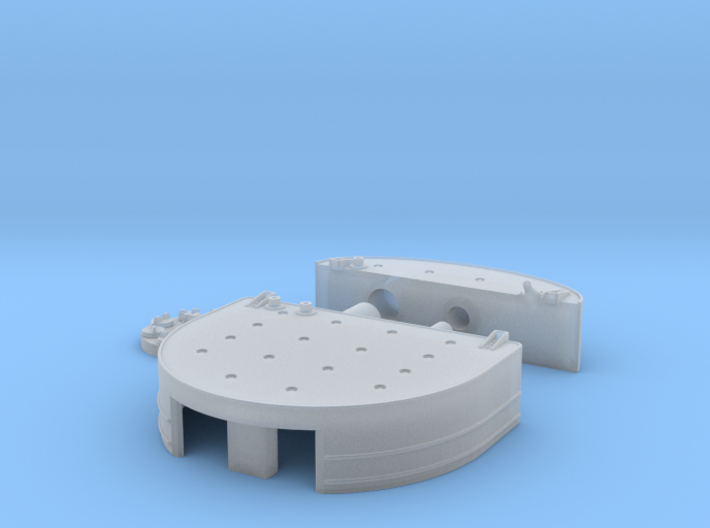
1:32 Albatros D.V/a Fuel Tank for WNW
Separate upper (reserve) and lower (main) tanks, plus a sprue containing 8 fuel caps and the fuel level sender header. Our model is based on careful scrutiny of photographs and drawings from a number of sources, most important being the fastidious reproduction units made by The Vintage Aviator, Ltd. in New Zealand.
This version of the tank is designed to be a direct replacement for the kit part and therefore features a recess in the rear lower portion of the tank to clear the kit wing tabs -- a feature that is not present on the full scale article. It also lacks details present on the lower portion on the tank -- notably the main fuel tank drain "funnel" and the cylindrical housing for the lower portion of the fuel sender, as incorporating these features would require modifying the kit fuselage. For those who may desire this level of realism, a future release will offer these details.
Preparing the parts for painting
The parts will arrive with a slightly greasy coating. This should be removed prior to painting.
To remove the coating, scrub them with a toothbrush in ordinary dish washing liquid and rinse thoroughly, or soak them for not more than 5 minutes in a small jar filled with acetone (nail polish remover.) When the parts are thoroughly clean and dry, the areas where support material had been will appear bright white.
Surface Prep: Dealing with 3D Printing Artifacts
These parts are made with a layering process. Although the the layers are very fine (16 microns), they will be visible, especially on curved areas like the top of the tank where they will manifest themselves as "steps". Also the large flat areas on the front of the tank may appear slightly textured. The original tank was made of smooth brass sheet, so these textures are not desirable.
Start by painting the tank parts with a good model primer. We recommend Alclad Grey Primer and Microfiller. Once primed, you will be able to see the areas that need attention. To these areas only, apply thin coats of a high-build surfacer such as Mr. Surfacer with a brush. Next smooth and finish these areas with sharpened sanding sticks. (Hint: a resin saw is useful for chopping sanding sticks at a sharp angle.) With a little care this can be done without obliterating the fine details.
Assembly
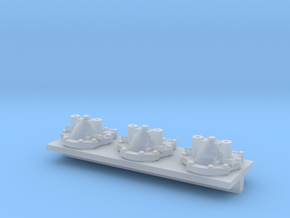
Basic assembly should be fairly obvious -- the upper tank slips over the fuel filler neck and sender tube of the lower tank. On the accessory lug we have included 8 fuel filler caps -- plenty for the carpet monster and spares, as you only need two for the Albatros fuel tank. Carefully cut these from the lug before attempting to remove the fuel sender top from the lug.
Painting
1:32 Albatros D.V/a Fuel Tank for WNW
Separate upper (reserve) and lower (main) tanks, plus a sprue containing 8 fuel caps and the fuel level sender header. Our model is based on careful scrutiny of photographs and drawings from a number of sources, most important being the fastidious reproduction units made by The Vintage Aviator, Ltd. in New Zealand.
This version of the tank is designed to be a direct replacement for the kit part and therefore features a recess in the rear lower portion of the tank to clear the kit wing tabs -- a feature that is not present on the full scale article. It also lacks details present on the lower portion on the tank -- notably the main fuel tank drain "funnel" and the cylindrical housing for the lower portion of the fuel sender, as incorporating these features would require modifying the kit fuselage. For those who may desire this level of realism, a future release will offer these details.
Preparing the parts for painting
The parts will arrive with a slightly greasy coating. This should be removed prior to painting.
To remove the coating, scrub them with a toothbrush in ordinary dish washing liquid and rinse thoroughly, or soak them for not more than 5 minutes in a small jar filled with acetone (nail polish remover.) When the parts are thoroughly clean and dry, the areas where support material had been will appear bright white.
Surface Prep: Dealing with 3D Printing Artifacts
These parts are made with a layering process. Although the the layers are very fine (16 microns), they will be visible, especially on curved areas like the top of the tank where they will manifest themselves as "steps". Also the large flat areas on the front of the tank may appear slightly textured. The original tank was made of smooth brass sheet, so these textures are not desirable.
Start by painting the tank parts with a good model primer. We recommend Alclad Grey Primer and Microfiller. Once primed, you will be able to see the areas that need attention. To these areas only, apply thin coats of a high-build surfacer such as Mr. Surfacer with a brush. Next smooth and finish these areas with sharpened sanding sticks. (Hint: a resin saw is useful for chopping sanding sticks at a sharp angle.) With a little care this can be done without obliterating the fine details.
Assembly
Basic assembly should be fairly obvious -- the upper tank slips over the fuel filler neck and sender tube of the lower tank. On the accessory lug we have included 8 fuel filler caps -- plenty for the carpet monster and spares, as you only need two for the Albatros fuel tank. Carefully cut these from the lug before attempting to remove the fuel sender top from the lug.
Painting
Details
What's in the box:
1:32 Albatros D.V/a Fuel Tank (WNW drop in)

Dimensions:
Success Rate:
First To try.
What's this?
Rating:
Mature audiences only.