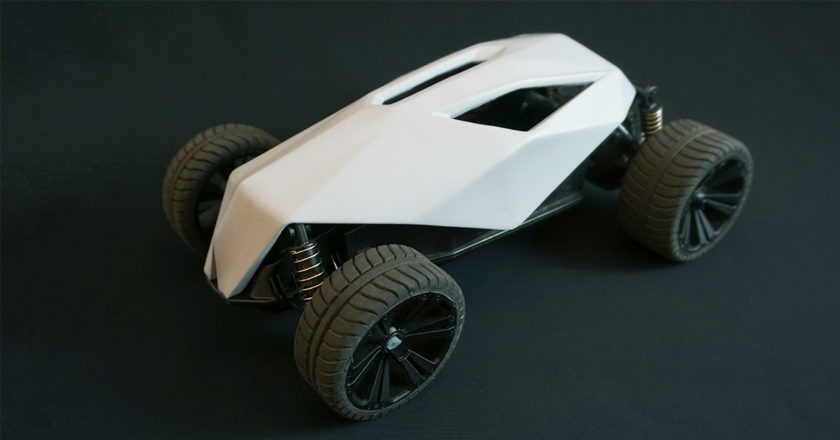
We continue our tutorials for the free, online 3D modeling tool Vectary with a step-by-step guide on how to redesign a chassis for an RC car and 3D print it with Shapeways.
If this is your first time using Vectary, here’s a quick guide to get you started and learn the tool’s basics.
We worked with a Revell RC Police Car. So if you can get your hands on one of those or something like it, sign in to Vectary, then open this chassis template. Vectary is meant for remixing open-source models, so we all can build on one another’s creations.

If you can’t find a Revell RC Police Car or a similar Revell car, pick another RC car, strip it down, and measure the undercarriage.
To draw an outline of the chassis, set up your scene in Vectary: On the bottom row, you’ll see Snapping. Enable Snapping. Then Open the Snapping options menu and enable Keep Buttons in Dock, Snap to End, and Snap to Grid. Go to Settings, also at the bottom. Enable Grid, and set your Square Size to 1mm and the Grid Size to 200mm. Enable Dimensions also.

Rotate the grid to see it from above. If you’re using the Revell RC Police Car, these are the dimensions, in mm.
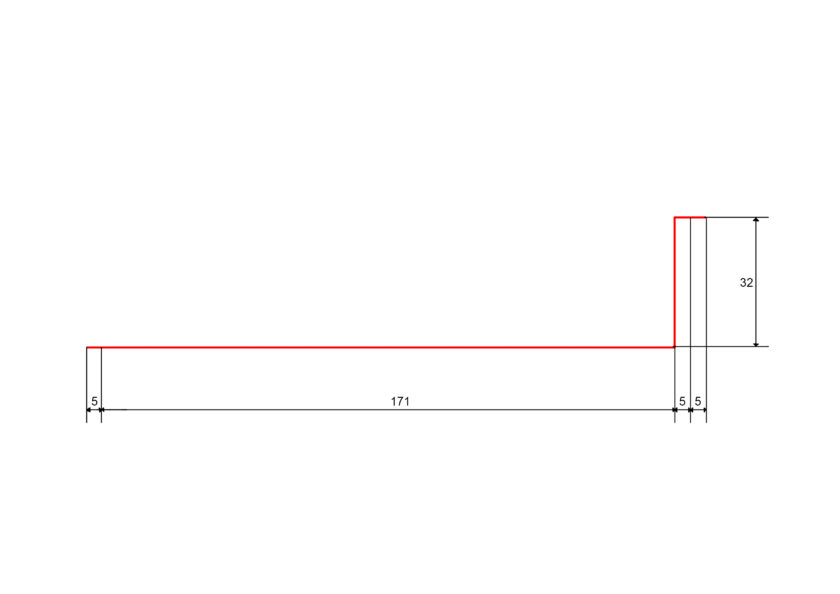
Otherwise, draw an outline of the RC car’s undercarriage, based on the measurements you took.
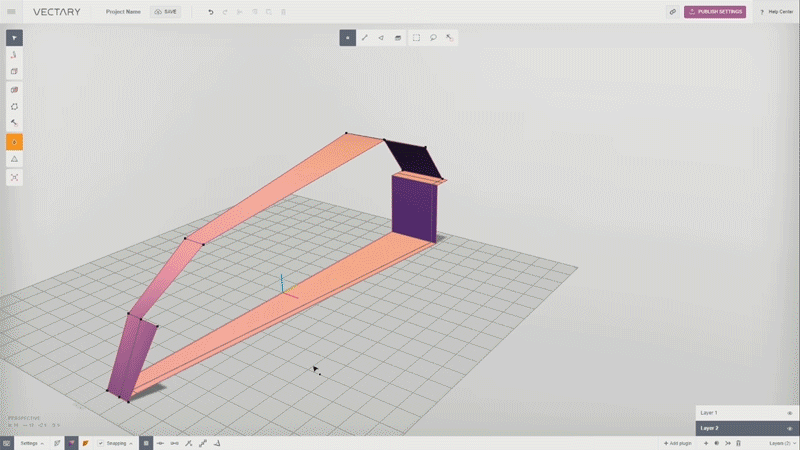
In either case, set your scene in side view and draw your diagram along the x axis — the green one.
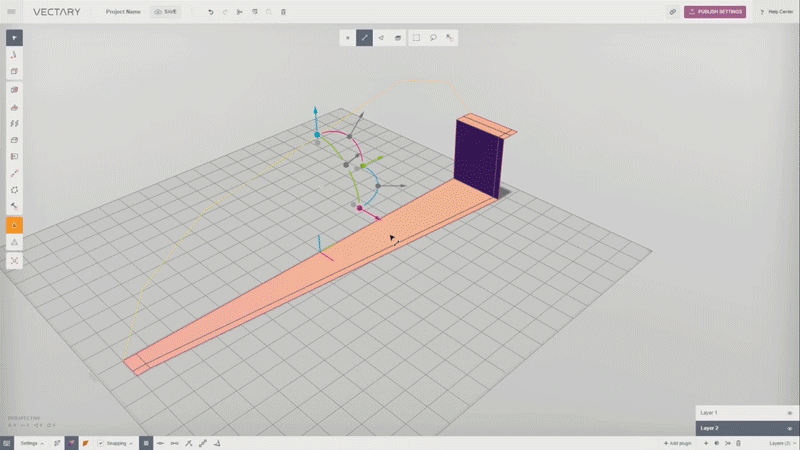
Select the lines. Then select the Extrude button, hold the shift key, and drag to pull the edge to the desired width.

Select the line you created. You will see a semicircle and a set of arrows. This is Vectary’s transformation tool, aka the gizmo. You can use the gizmo to move, scale, or rotate your selection.
Move the green arrow on the gizmo to adjust the shape.

Now that you’ve created a base, you can move to designing the cabin. Click on the + icon to create a new layer. Turn off Snap to Grid. Using Draw Lines, draw the outline of the car’s cabin.

Again, use the Extrude function to turn the outline into a face. Adjust the shape of outline by using the gizmo to move, scale, or rotate the face while switching between points, lines, and faces.
You can also add faces to your model by holding the shift key while using the Extrude function and dragging the magenta arrow on the gizmo.

Turn on Snap to End. Use Draw Lines to create as many more faces as you like.
Select several points on the extruded faces and join them together with the Collapse button in the left toolbar.
Make sure you select only the points that you want to join. If you select all the points and click Collapse, it will collapse the whole shape.

Select Draw Lines and add in any missing faces. Using the Move arrows on the gizmo to adjust the shape.

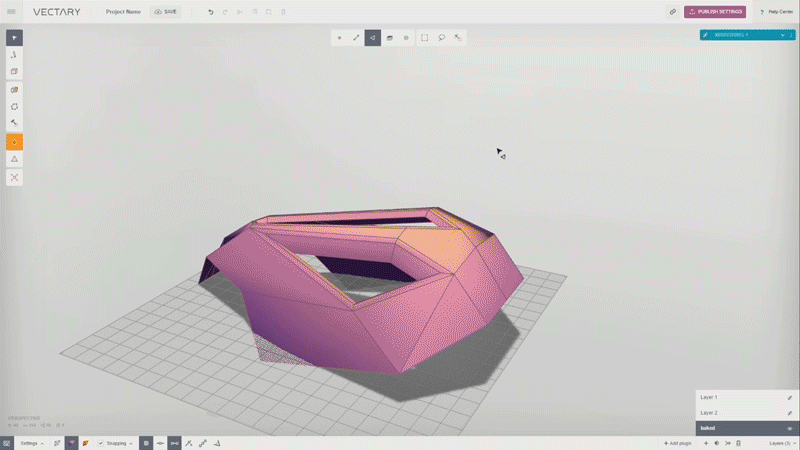
Select +Add Plugin at the bottom right of the screen to open My Plugins. Choose the Mirroring plugin. Select the layers and axis that you want to mirror. When you are satisfied with your shape, select Bake from the dropdown menu at the top right of the Mirroring 1 panel.

The Bake command creates a new layer. Hide the old layers. At bottom left, switch the render view to Shaded to see the geometry.

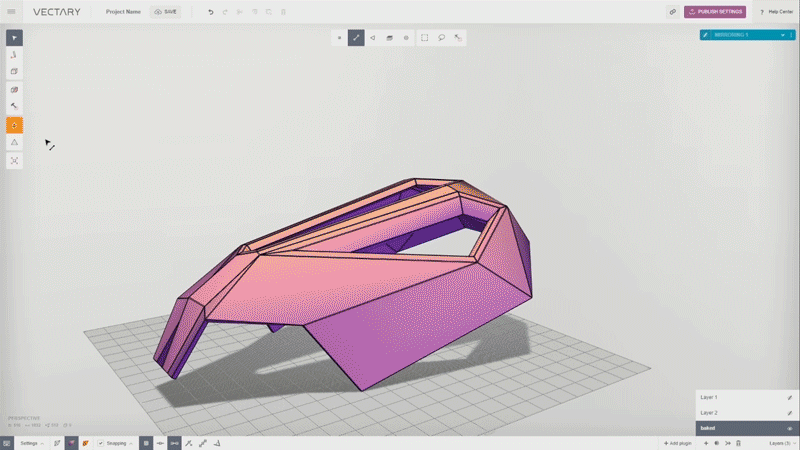
Select the center line. Find Bevel in the left toolbar to create an additional faces. You can enlarge them with the cube on the gizmo.

Select the new faces and bevel repeatedly inwards. More lines will create a more angular look after smoothing.

Move the selected faces, then Select Delete Selection in the top toolbar.

Repeat Bevel, Move, and Delete on both sides of the car.

Use the Marquee tool at the top of the screen to select all the faces. Click on the white gizmo circle and switch the jog to Local. Extrude inward (by dragging the arrow while holding the shift key) to add thickness.
Choose the Select Lines button, then use Marquee to select the whole object. Select Bevel to create more edges.

In the left toolbar, turn on Smoothing and use the Colorpicker to choose the desired shade. (Note: the color of your rendering has no bearing on the color of your 3D print.)
Next, click +Add Plugin, and in My Plugins, select the Shapeways plugin and Check Geometry. We chose Shapeways Strong and Flexible Plastic from the materials dropdown because it is durable and relatively inexpensive; printed in white, the car cost about €39 (or $45).
Once ready, click the Send to Shapeways button.
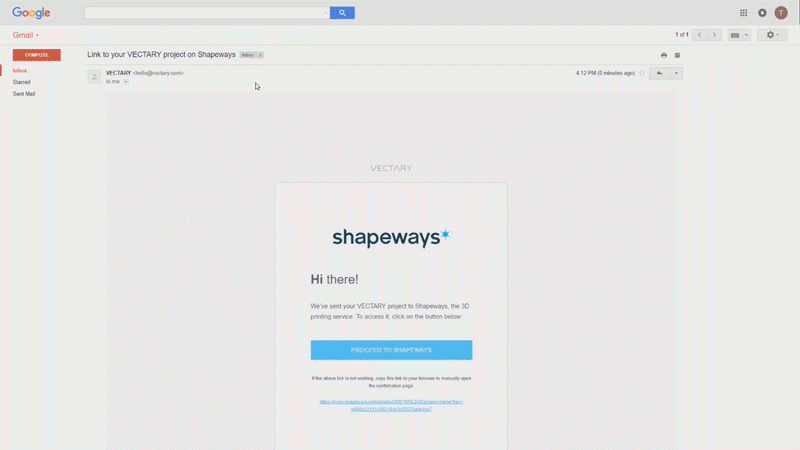
Shapeways will send a confirmation link via email. (It may take a few minutes for the message to reach your inbox.) Confirm your order on the Shapeways site.
Give Vectary a shot and get your car ready for racing.