

Our Tamiya F350 upgrades with AmPro Engineering printed parts
When Ruud and I took part in Walk The Trial XV in Belgium, we couldn’t just show up with any old RC car. This would be my fifth time at WTT, an event that’s doubled in size every couple of years. Since it’s become a pretty serious event, I asked a friend if I could borrow one of his higher-performance RC cars. Of course, I could not leave it untouched. Luckily, my friend is pretty used to my adventures in upgrading RC cars with Shapeways parts, so he’s going to love what we did with it (I hope — he hasn’t actually seen it yet).

The Ford F350 at WTT X back in 2014. Picture by Davy de Weirdt
Introducing the car
We began with a 1:10 Tamiya truck with a Ford F350 hardbody and a High Lift chassis. The cool thing about this truck is that it has a working 3-speed gearbox and proper metal leaf springs. Those elements of realism make it far from the best handling RC scaler/crawler truck, but the challenge makes it a lot of fun to drive.
It does has one major flaw, however: the low-hanging transfer case in the middle of the chassis. The transfer case easily gets stuck on ridges, rocks, and tree stumps so often that driving becomes frustrating. So we needed to address this before Walk the Trial.

Before and after the transmission lift; Ground clearance!
Once again I turned to my friend Alberto at the AMPro Engineering Shapeways shop. Alberto has released a conversion kit for the Tamiya High-Lift that relocates the motor, shift servo, and battery, so it can lift the transmission and transfer case.
Alberto designed the kit for a High-Lift with a Toyota Hilux body, but I told him I would gamble and try to make it fit on a Ford.

The relocated motor sits under the hood
The AMPro Engineering High-Lift kit comes with a new gear cover, a motor mount, lift brackets for the transmission, a shift servo mount, a couple of spacers, and a new battery door with mounts.
If you want to see more about the AMPro Engineering High-Lift conversion kit, you can watch the four-part build series on Alberto’s YouTube channel. The actual build starts in Episode 2:

Pro tip: The brass bushings you often replace with ball bearings make for great spacers!
Installing the kit
Initially the build went smoothly. The AMPro parts have a great fit and use most of the original Tamiya screws to make the build even easier (and cheaper!). The only difference I found between the Ford chassis and the Toyota is in the rear bumper — a problem easily fixed by adding some spacers around the battery door mount.

The converted chassis up and running
When the time came to fit the body onto the chassis, however, things started to go wrong. First of all, the gear cover was now hitting the body because it had been lifted up so much. Also, the body mount for the cab required a lot of cutting, as it sits lower on the Ford than it does on the Toyota.
I used the spacers that came with the conversion kit to lift up the body mount and the bed as well. This made it fit, but only just.
Next, the shift servo sat too far forward, hitting the tabs that hold the bed against the body. After scratching my head for a while, I figured out that I could use regular Tamiya servo mounts instead of the ones in the AMPro conversion kit. This required drilling two holes in the frame, but it allowed the servo to move further down and to the back, leaving enough room for the battery and the bed to sit on top.
Problems solved, conversion kit installed, and the car was ready for testing!

JSScale Jeep FlatFive wheels & hub covers
Making it look the part
Along with the 3D printed pieces hidden under the body, I also wanted some enhancements that were visible on the outside. I found these cool Jeep FlatFive wheels with matching hub covers in the JSScale Shapeways shop and thought they would look good on the car. After printing, I gave them a coat of silver and black paint and added some SDI Trail Doctor tires.
I ordered some Shapeways stickers from MCI Racing to finish the body and also to hand out at Walk the Trial. I mean, who doesn’t love stickers?

Shapeways stickers finishing off the body
The performance
The Ford F350 conversion did exactly what it was supposed to do. The chassis did not get stuck a single time while out on the trail. It is now so much easier drive over rocks and logs, which there were plenty of at Walk The Tria! If anything, the improvements made it obvious that some other parts of the car could use an upgrade. For instance, the tires had no foam inserts, causing the truck to slide over the sidewall of the tires and even to tip over sometimes.
The 3D printed gear cover and motor mount also held up fine, notwithstanding the strong torque created by the truck puller motor in the car. Likewise, the stock driveshafts had no problem rotating at a steeper angle.
This souped up Ford F350 is such a great truck now! And I hope I can borrow it some other time to try more trails. Maybe Walk The Trial XIV?

Some more glamour shots of our F350
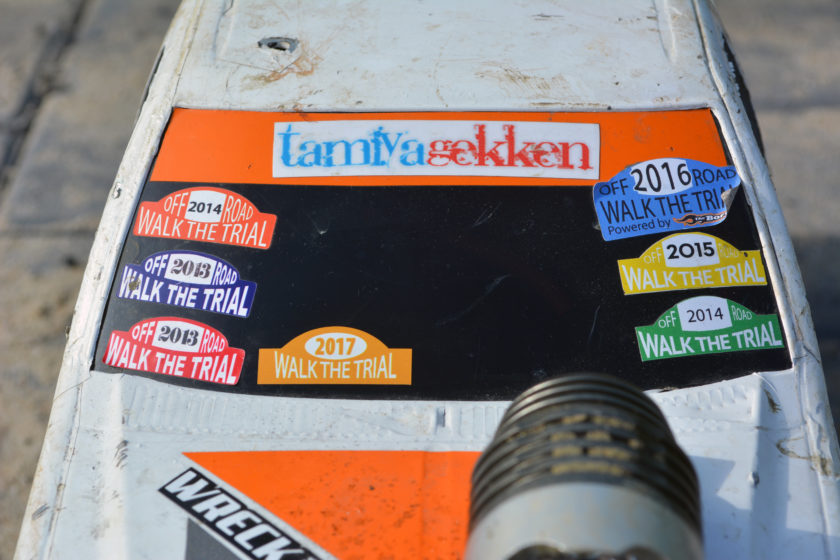
At least 7 WTT editions on this truck, judging by the decals

Hope to see this car back on the trails soon!