
In this intermediate to advanced tutorial, we’ll show you how to use any phone with a camera to scan real-world objects.
How do you capture a texture? As a kid you would grab a crayon and a white sheet of paper to reveal and replicate the surface. Today, you would probably snap a photo and fill your Instagram with the unique surface textures or patterns. But hold up, we live in the future and can create a real-life, wearable design out of those patterns and textures.
With photogrammetry you can scan your favorite item or texture and turn it into a ring. Accurately replicating a surface texture can be difficult to do through traditional 3D sculpting. Using 3D scanning, you can precisely capture the texture with ease.
In this guest tutorial, Bernat Cuni of Cunicode has tested and created a step-by-step instructional on how you can create your own textured ring. Using Autodesk Recap and an iPhone, Cuni was able to replicate the bark from a pine tree in the French Pyrenees.
With new applications, creating objects using photogrammetry has become easy and inexpensive. For those unfamiliar with the term, Photogrammetry is the process of stitching together multiple images from a real-world environment or object to then form a high-quality 3D model, map, measurement, or drawing. In our case, we will be using the technology to create a 3D model.
Before we begin the tutorial, let’s go over what you will need in order to create your textured ring.
- Digital Camera
- You can use your phone, no need to go out and purchase an expensive camera.
- Photogrammetry software
- Free: 3DF Zephir: Windows
- Paid: Autodesk ReCap Photo: Windows
- Paid: Agisoft Photoscan: Windows, Mac, Linux
- RealityCapture: Windows
- Open Source:Regard 3D: Windows, Mac
- MeshLab & Meshmixer
- Open source and free software for processing and editing 3D meshes. Works on Windows and Mac.
- 3D Modeling Software
- You can select your favorite modeling software to edit the ring to your specifications.
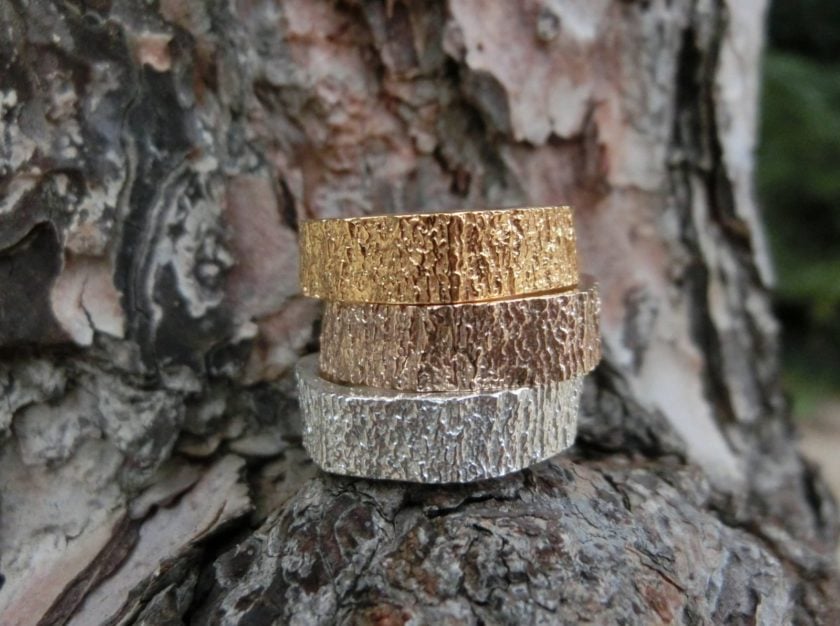
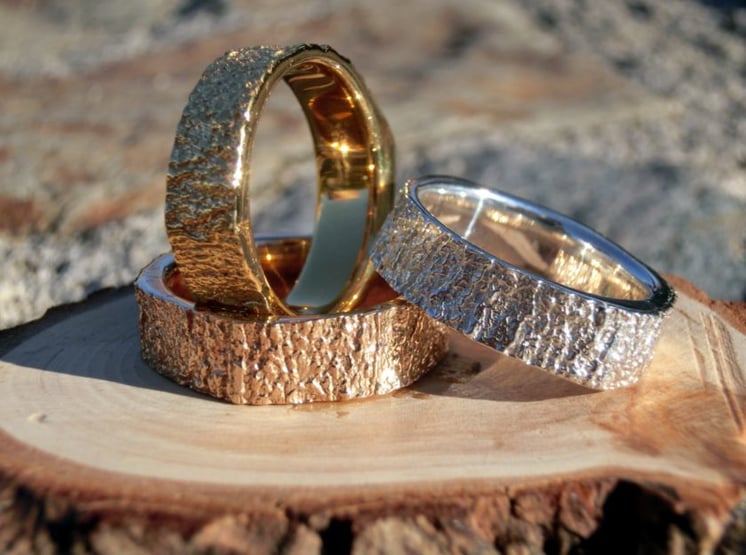
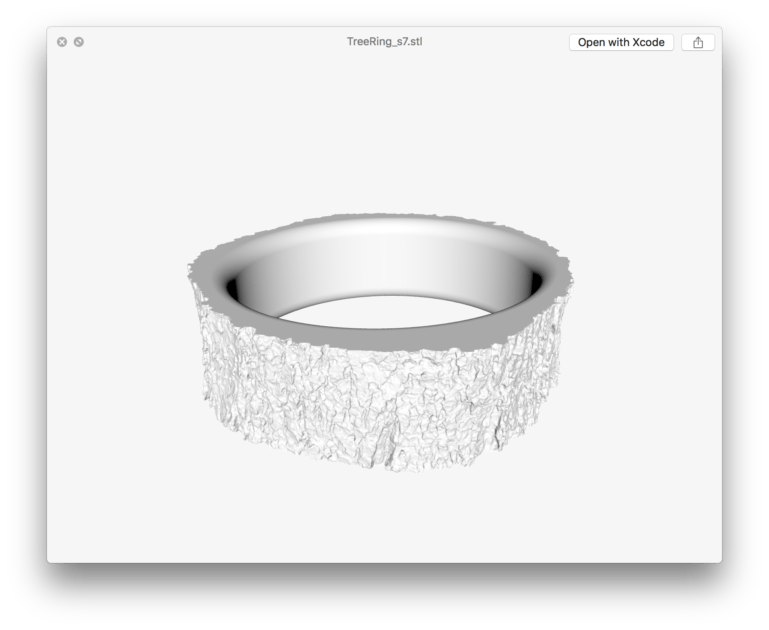
We’ll show you how to create this ring, which you can then print in any of Shapeways’ metals
Step 1: Select Your Texture or Object
In order to begin, select the object, texture, or pattern you would like replicate and use to create your ring. Bernat has selected a tree within the French Pyrenees.
It is best to avoid shiny or transparent objects as they are difficult to capture.
Step 2: Take Images of Your Texture or Object

To begin you will need a set of photos of the object to process them into a valid 3D model.
Using a digital camera (your phone will work), take images of the object. Make sure to get all angles of the object from the same or close to the same distance. Bernat went around the object 3 times (one at eye-level, one looking up, and one looking down) in order to ensure that every angle was captured. In total, Bernat took 56 photos at 2049 × 1537 pixels. You do not need this exact amount but it is helpful to understand that the more photos you have, the more data you have to work with.
Note: It is important to have consistent lighting conditions while you are shooting your object. If you are outside, it is best to shoot the images on a cloudy day to avoid shadows. If you are inside, bright lighting is necessary to receive the clearest photos with the most data. Do not edit the photos, as they should contain the EXIF data for better processing (lens used, shutter speed, etc).
Step 3: Upload and Process Photos
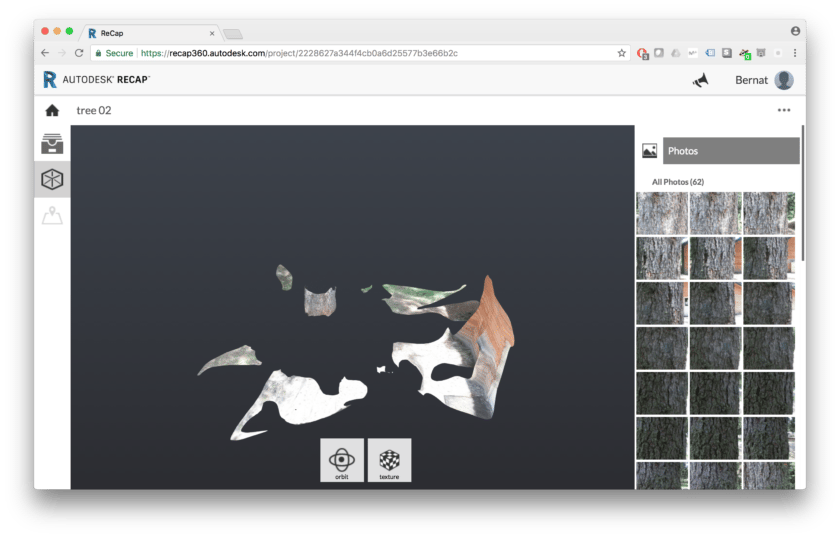
Upload your photos to the photogrammetry software you selected above. Bernat used Autodesk’s RecapPhoto and processed the 56 tree images he took. For the photogrammetry software you selected, follow its instructions on processing and stitching your photos. This can take anywhere from a few minutes to a few hours depending on the settings and photos you have chosen.
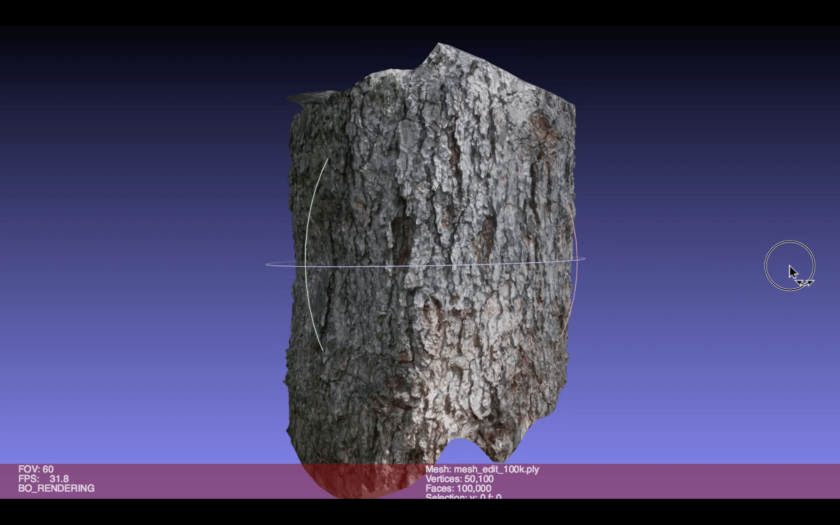
Step 4: Clean Up & Cut Mesh
The mesh that was then revealed was larger than necessary and contained more data than for the object he was looking to create, including nearby trees and buildings. Bernat went ahead and cleaned the mesh using MeshLab. He selected the bark and tree he wanted to keep for his design and deleted the rest of the scan data.
The bark was now isolated and could be cut and brought to scale. You can then download the file from MeshLab and import the design into MeshMixer. From there use the PlaneCut tool to trim the mesh to the desired thickness. 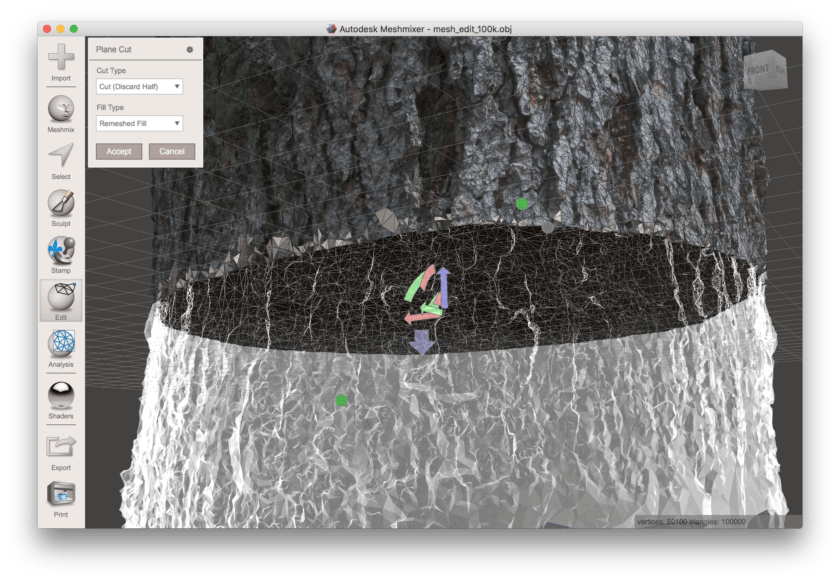
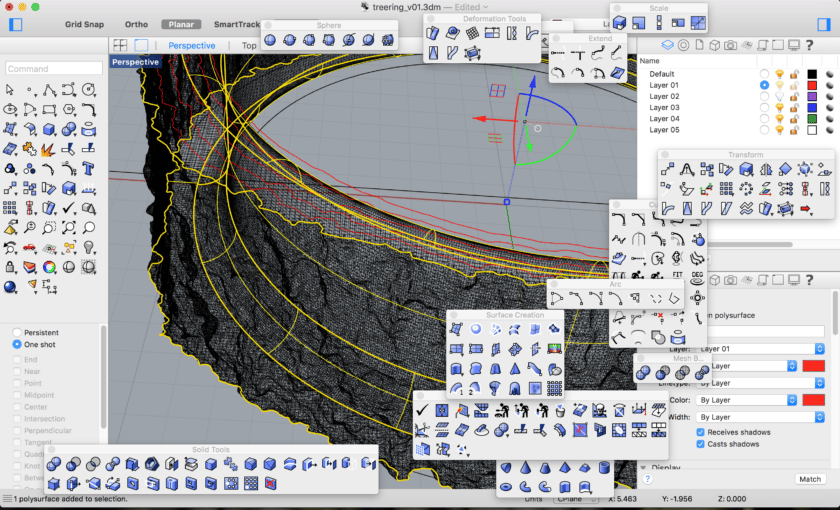
Step 5: Create a Mesh Solid

This can be done with another modeling software of your choice. Bernat used Rhino to turn the surface into a solid, using the Mesh command. Once the design has been turned into a solid, you can then edit the design to create a ring. Cut a hole from the center of the solid and fillet the interior edges.
Step 9: Upload to Shapeways
Once you have scaled the design to your appropriate ring size, you can upload directly to Shapeways. You can upload multiple sizes to sell in your shop or print just for yourself.
Watch Bernat’s explanation of the design process through his video below:
For more inspiration from Bernat Cuni, check out his MoonRing. where he created an accurate texture of the moon using scanning data.