


A unique look, custom stickers, and most important, improved performance!
The wait is finally over! After months of hard work, we’ve just completed our fully customized, 3D printed Tamiya Hornet Superfly RC car. As with any good RC customization project, we ran into some bumps on the road (pun intended). Despite the delays, I’m convinced the final results are well worth the wait. Watch the video below to see the final steps needed to finish this beauty!
Previous RC Customization Series Episodes:
Lap 1 – Upgrading The Tamiya Hornet
Lap 2 – RC Engineering
Lap 3 – Finalizing The Parts
Below, you can see the steps taken to create this fully customized Tamiya Hornet Superfly 2.0. While we were in the process of making this car, rumor has it that Alberto from AMPro Engineering has been working on a Version 3.0 of the Superfly. Subscribe to his YouTube channel to see what he’s developing!
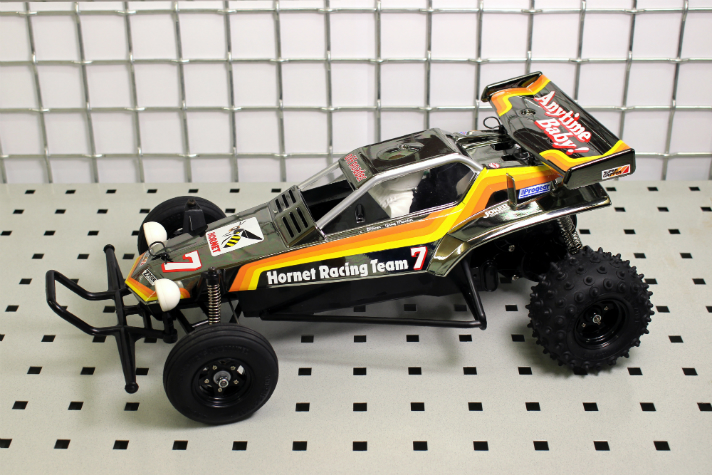
What the original Tamiya Hornet looked like before Tijs’ work transformed it
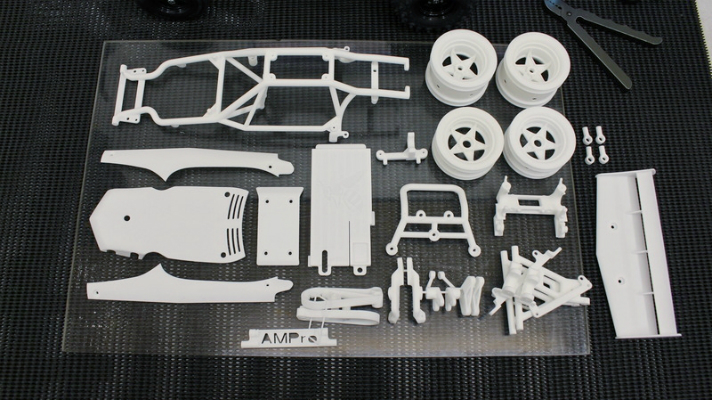
We started the project with a lot of 3D printed products from AMPro Engineering

During pre-assembly, thread wires were tapped and we fitted the car together. Also, the color palette for the final car was decided.

From using traditional polished & dyed Strong & Flexible plastic for the internal car parts…

…to Tijs spending hours polishing away the unavoidable stepping caused by 3D printing.

Installation of the battery and other electrical components
We finished by adding custom vinyl stickers
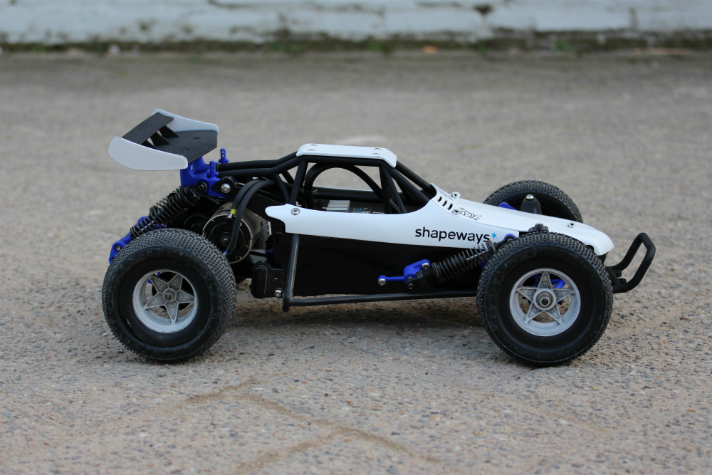
To complete the new look, we bought a new set of tires and added the black suspensions. These combined with the 3D printed parts significantly improved the performance of the car, making it more reliable and predictable on the road.
As you can clearly see, the car transformed completely. While it took a lot of work, we’re sure it is totally worth it. How far have you gone in customizing your RC car? Share your story below!
I re lived my childhood and purchased a Hornet at Christmas. It was great fun building and bashing it around. As I normally do with anything I own I looked to see what improvements could be made. After some time on the internet I discovered this company called Ampro engineering. They made upgrades for the Hornet. I look to find where to buy these parts and came across shapeways, a company that 3D prints your design. I was in total amazement!
So I started with the battery cover as that’s the first thing to fall off and spoil the fun. I also started gathering parts like screw bags and connectors in preparation for when I purchased the 20mm offset suspension.
Needless to say that when I did order the parts I had everything to make the conversation work perfectly.
So far I have upgraded the motor to a torque tuned then to a BZ, Fitted some 2.2 wheels and tyres, fitted a rear upper shock support, lower adjustable shock mounts and some CVA shocks.
Future planes are to replace the chassis due to damage and also fit some new electronics. I’m also going to keep trying new shocks as I’m not happy with the CVA’s
I love the work Ampro and shapeways are doing and look forward to more innovative products (I just watched the diff locker episode from Ampro and I’m keen to see how it works as I think that will have to be added to my Hornet).
Thanks for your comment! We love the Hornet too, even in stock form. But I have to admit that the AMPro suspension really transformed the car. It’s still very much a Hornet, but a very very good one.
Did you see the new independent rear suspension that Alberto of AMPro Engineering is working on? I’m very keen on trying it on our Hornet!
I tested my new Ampro front suspension the other day and it worked great. The rear is still terrible.
I have been keeping upto date with Ampros work on the rear and I’m looking forward to seeing the car in action.
@Stewart yeah we’re very interested in testing that out soon too – the Double Wishbone suspension looks rad! Do you have some pictures of your Tamiya? Feel free to share via [email protected] or tag us in a photo on Instagram!