

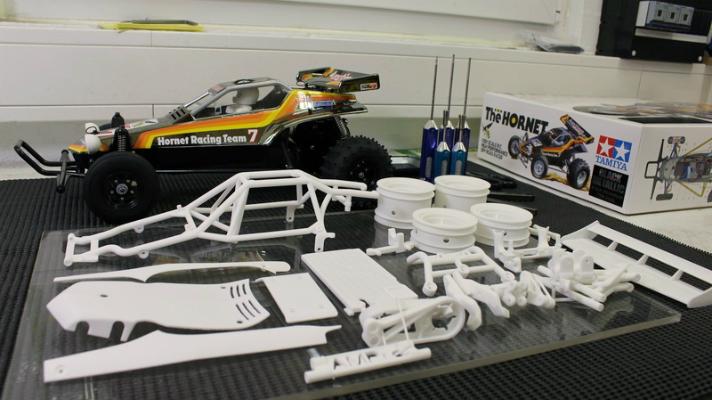
In the previous Lap of the RC Customization Series you could see how Tijs prepared the 3D printed parts for assembly. We now know for sure that the parts will fit together, and that they fit on the original Tamiya Hornet body. But just connecting them to the original body will not finish our RC car — we need colors!
We quickly agreed on the colors for the car: white, black and blue. To achieve that, Tijs recommends using two different methods for finishing the parts. For some items we use the dyeing process that we offer at Shapeways. The other components will be spray-painted, and for that we need some additional tricks. Tijs is way more experienced in the spray-painting method, so we decided to split the workload.
I spoke with Lisa from our Strong & Flexibles team in Eindhoven. Lisa explains the process that we normally use at Shapeways when you order colored Strong & Flexible plastic. First, Lisa and I polish the models in giant tumblers, filled with ceramic cones. The stones will scrape off a thin layer of the products’ surface, giving them a smoother feel and also make them less sensitive for stains.
The next step for the parts is the actual coloring. For that, we put them in a pan with a solution of water and color pigment. Within a couple of minutes the exterior of the products changed color, as you can see in the video above.

These parts have been dyed black. For black, we do not polish the parts.

Blue Strong & Flexible is first polished. To keep the color from fading during intense use as racing with the Tamiya Hornet, Tijs also sealed the parts with a transparent varnish.
In the meantime, Tijs was busy preparing the other parts for spray painting. The surface has to be smooth, so the first thing to get rid of is the stepping, the layered pattern on products, which is an unavoidable side effect of using 3D printing for your products. Tijs first uses two types of sandpaper and then applies a primer for plastics.

The grey area is the half treated with primer. On the white half, you can clearly see where the stepping was on this part. After some work, these will forever be hidden under a nice glossy white finish!
While I thought it looked pretty smooth after applying the first layer of primer, Tijs is not satisfied yet and decides to use a technique he calls “wet sanding,” meaning he uses wet sand paper on the parts treated with the primer. By doing so, he removes the layer of primer and smoothens the nylon plastic. The Strong & Flexible plastics can be porous, so by rinsing them with water the excess material will definitely not remain on the parts. This step is repeated a few times, and then after applying a final layer of primer, the glossy white spray paint is applied.

The roof on the left is finished with a gloss white spray paint, while the other parts are ready for finalizing. Almost there!
So, the parts are nearly done — but we still need to assemble the car. More about that in the final Lap of the RC Customization Series, coming your way soon!
Just used Shapeways to print out a new differential for my old MRC Rc truck. Can’t get parts anymore and wanted to make sure that I could get replacements! Next step is to draft some of the chassis bits.
Woa that’s so cool Andrew! Make sure to share the results with us in the RC forum (https://www.shapeways.com/forum/f/rc-cars-boats-and-planes.121/) so we can follow your progress!