
At Workbench Conference in Atlanta, Georgia, I and the Shapeways team rolled up our sleeves and got to use (or at least pose with) some impressive power tools. We also met dozens of makers using wood and metals to realize the most incredible projects. With folks like Bob from I Like To Make Stuff, our (now IRL!) friends Evan and Katelyn, Jimmy Diresta, and countless others convening, we had ample opportunity to talk to all of them about the tools of their trades. A huge percentage of the creators we spoke to use SketchUp in their design process. But, they didn’t realize how easy it is to export and 3D print their SketchUp files. So we created a quick tutorial to walk anyone using SketchUp through the super-simple process. But first, let’s meet the designer behind the model we’ll be printing.
Self-taught furniture designer Chris Salomone of Foureyes Woodworking & Design gave us the scoop on how he creates his designs prior to the final woodworking process. Nine out of 10 times, Chis will start his design process in SketchUp. While following the framework of each project’s design constraints, he’ll prototype 10+ iterations in SketchUp and narrow down the final model from there.
Being able to transform your digital model into a 3D printable file is an easy way to see physical furniture prototypes in miniature if you want to experiment with different components or design modifications before building it. This can also make a memorable little (literally) gift if you want to print a miniature of a client’s commission!
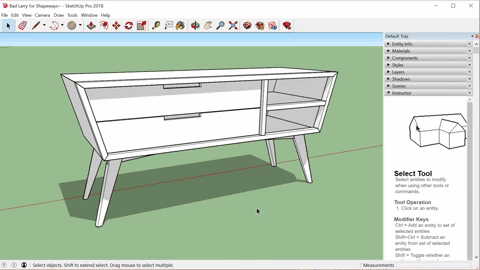
We asked Chris to send us a model that we could use as an example in our tutorial on making SketchUp files printable, and so he sent us his popular modern credenza. Watch the video below where Shapeways’ Lauren Slowik walks you through the process, then get your own mini 3D printed models of your designs.
It’s that easy!
Check out how Chris built the (gorgeous) final product here: