
I’m really excited about this weeks post. Not only did the test prints come out well but as a creator concept I really think this idea has legs. We published the ring creator a few years ago and the response and sales have been very favorable. Looking through the designs people make it’s clear that signet ring type usage is desired. ShapeJS has had a signet ring example for awhile, but for this posting I improved it with side images and engraved text. In terms of new ShapeJS concepts we’ll go over Text,Embossing,Mul and Mask.
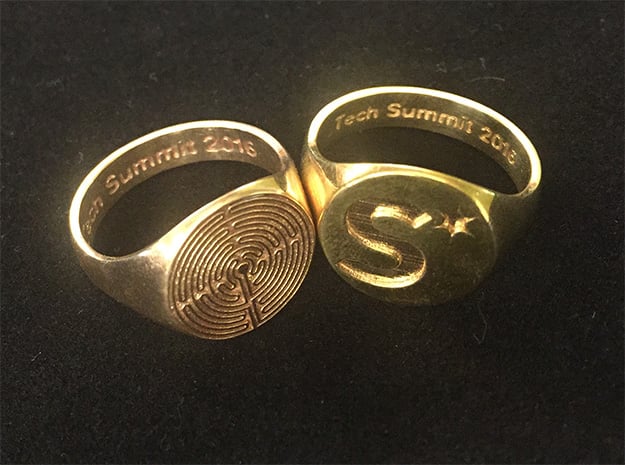
Let’s start with a photo of the first test rings. These are with the text engraving but not the side images. The user gets to choose the top imagery, the engraved text plus the typical ring size and width.

Originally I had the image go completely through the ring. For this revision I changed to having the image engraved. We are working up to having shopper friendly creators available and we found that explaining when pieces would fall out was difficult. Engraving the top allows you to ignore that problem and there’s never a question whether it will be structurally sound. Here is a picture of the original style:

How would you go about modeling this ring style? The primary area of interest is the top image area. We want a flat area that blends nicely into a band. Let’s start with a Cylinder slice as the top area. This gives us a circular landing area. Here is a diagram showing the setup we’ll use.

We made the height of our image area(called a bezel) 1.5mm. This gives a nice feeling weight to the ring and insures that we have enough space to engrave at least 0.35mm deep as required by the guidelines for polished metals. The next part we’ll do is cut the cylinder with two planes at an angle. This gives us something more interesting then just a straight sided cylinder. Here is the code for this portion:
  // bezel is cone truncated by 2 parallel planes
  var bezel = new Intersection();
  bezel.add(new Cone(new Vector3d(0,Ay, 0), new Vector3d(0,-1,0), bezelAngle));
  bezel.add(new Plane(new Vector3d(0,1,0), bezelTop));
  bezel.add(new Plane(new Vector3d(0,-1,0), -bezelBase));
Now let’s turn towards getting the band correct. For this we’ll start with a Sphere(ringBase) which will be a radius of ring size + the ring thickness. From this sphere we’ll cut out a cylinder for our finger(thru). Then we’ll use the combination of a cylinder and box to create the arch like shape on the sides(cutoff). The final band will be the base sphere plus the bezel that we then subtract the finger thru hole and the side cutoffs.
  var ringBase = new Sphere(outRad);

  var ring = new Union();
  ring.add(ringBase);
  ring.add(bezel);

  var cutoff = new Union();

  var gw = gridWidth;
  var gw2 = gridWidth/2;
  var thru = new Cylinder(new Vector3d(0, 0, -gw2),new Vector3d(0,0,gw2),inRad);

  cutoff.add(new Cylinder(new Vector3d(-gw2, Ey, Ex), new Vector3d(gw2, Ey, Ex), cutR));
  cutoff.add(new Cylinder(new Vector3d(-gw2, Ey, -Ex), new Vector3d(gw2, Ey, -Ex), cutR));
  cutoff.add(new Box(0,-inRad,  Ex,  gw, 2*(inRad+Ey), 2*cutR));
  cutoff.add(new Box(0,-inRad, -Ex,  gw, 2*(inRad+Ey), 2*cutR));

  var partialRing = new Subtraction(ring,thru);
  partialRing.setBlend(1*MM);

  var fullRing = new Subtraction(partialRing, cutoff);
  fullRing.setBlend(0.1*MM);
Now that we have the ring modeled its time to turn to making it more customized. Using user imagery is a great way to add customization. For our signet ring we’ll provide 4 customizations points. We’ll have an image on top, an image on each side and text on the inside of the ring. In the past we’ve learned about the Image3D datasource. These easily turns images into 3D geometry. This is great for when we have flat areas to place things or a simple curve like a cylinder. Things become more tricky when we want to apply imagery to complex or unknown shapes. When dealing with these you’ll want to use the Embossing datasource. An Embossing let’s you change the surface of an object with another object. If your familiar with displacement maps in traditional modeling packages it’s a similar idea.
An Embossing takes a base shape and then an embossing shape. It also takes a minimum and maximum range value to limit the embossing distance. In general an embossing is only really good close to the surface, usually you wouldn’t extend further then 2*MM from the surface with this. This example also uses another new datasource called a Mask. A mask is used to select portions of a datasource you want to use for an operation. By default an embossing affects all sides of an object within its volume. For our ring this would mean the side images would emboss both the inside and outside. Since we want text inside we need to mask out the inside. We can do this by taking the band as the mask and shifting it to right or left. This creates a masked area on the outside to limit the application of the embossing to that region. Here is the code for left side imagery:
  if (args.leftImage !== undefined) {
    var edepth = ringThickness/4;
    var mask = new Mask(result,0,edepth);
    var maskShift = new Vector3d(1,0,0);
    maskShift.scale(edepth);
    mask.setTransform(new Translation(maskShift));

    var lbump = makeImage(args.leftImage, 0.84*2*Cx, By+inRad,12*MM,false);
    var trans = new CompositeTransform();
    trans.add(new Rotation(0,1,0,Math.PI/2));
    trans.add(new Translation(inRad,0,0));
    lbump.setTransform(trans);

    var maskedBump = new Mul(lbump, mask);

    var lsideImage = new Embossing(result,maskedBump);
    lsideImage.setMinValue(-edepth);
    lsideImage.setMaxValue(0);
    result = lsideImage;
  }
Since we are looking to engrave the ring we set the minimum value of the embossing to our desired depth and then maximum value to 0. Now that we have the imagery on the sides we are ready to tackle the engraved text. Text in ShapeJS is basically just like the Image3D node. Internally your specified text string, font and font styles are converted to a raster image. To do this you use the Text2D datasource. You then specify the font name and style you want to use. In a later tutorial we’ll cover how to use custom fonts. Text2D has alignment and centering options for the horizontal and vertical directions. Checking the online docs I can see we need put more detail there, so look for that soon. Here is the final ring:

One note about the image sizes. The side images are mapped to cover the whole side of the potentially largest ring. I used images of 400×667 resolution. Anything following that aspect ratio will work. If you adjust ring width you’ll reveal more of the image on the sides.
This wraps up our signet ring post. We’ve introduced a bunch of new concepts this week that we’ll reuse in later postings. Adding text and imagery to base objects gives your users plenty of options to make things their own. Using 3D printing we can make each object unique and this gives you the power to easily get it done. Here is the full code for your enjoyment: