

On tap for this week we’ll print our own coinage. Don’t tell me you haven’t secretly wanted your own currency! When we first introduced cast metals it was one of the first projects I thought of. Here are the first tests I’d did:
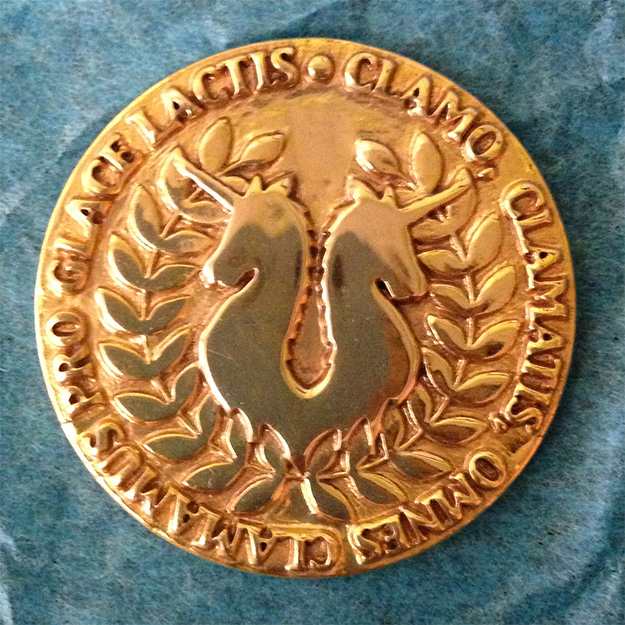
These came out well, better then I really expected. The detail was amazing, nice weight to them and they sounded right when you flipped them. If your latin is not so good, it says “I scream, you scream, we all scream for ice cream.” Well, maybe it says that, been a long time since latin class.
In terms of what went wrong. I overestimated the height needed so the text it a bit too raised from the base. It doesn’t feel completely right in the hand, more like braille then coinage. Looking more at real coinage they have some edges(called reeds). Adding those cleaned up the sides nicely. Here is the second attempt:

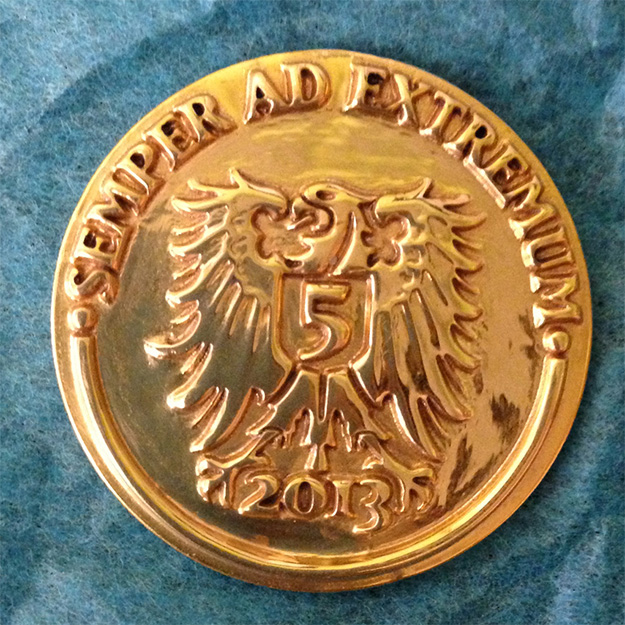
This time I also printed them out in stainless steel as well as the polished metals. Steel has a minimum height of 3mm. The detail is better then I expected and the pricing is certainly nicer. It does however feel a bit heavy for a coin. I also did a test with White Strong & Flexible coins, but I can’t say I really liked them.
You can create your own coins here: Coin Example
This script uses concepts we have mostly already covered, but there are a few more details of the Image3D datasource to cover. The first is the useGrayscale method. The default operation is to assume your image is black and white. Under the covers we process this into a distance transform. We do this so that lower resolution images looks better. For greyscale imagery we can’t do the same operation, we just take your image and use it to define the height. Black represents the highest points and white the lowest. Think of this like your drawing with a black pin, your ink creates 3D geometry, the darker it is the more of it.
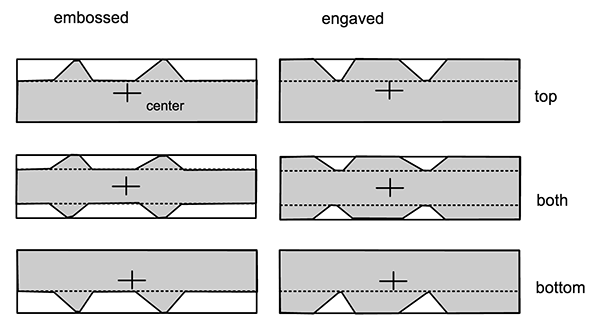
The second concept is the image placement options. When we create the geometry from an image it has a few modes. These are based off the setImageType and setImagePlace. The image type says whether we creating an embossed or engraved image. An embossed image has the darkest points going upwards whereas an engraving has the darkest points going downward into the object. The placement options say how the image is placed in the image box. Top placement puts the image in the upper area of the box, bottom does opposite. Both mode has the image in the top and bottom of the box. The following diagram gives a visual reference of the different modes:
Coins are fun way to start into the 3D printed metals. If you create your own coins or improve my script post into the forums and show it off.