

When I started working at Shapeways earlier this year, I knew that I wanted to model something to make for sale in our marketplace. It had been years since I last tried my hand at 3d modeling, so I wanted to make something simple and practical that was something I would use on a day to day basis. I decided at last that I was going to model a keychain bottle opener.
I set out with a few small goals for my bottle opener: I want to be able to attach it to my keychain, must be able to print in our stainless steel and cast metals, and the base model must cost less than $30 to keep it within a reasonable price range to sell after my markup is added.
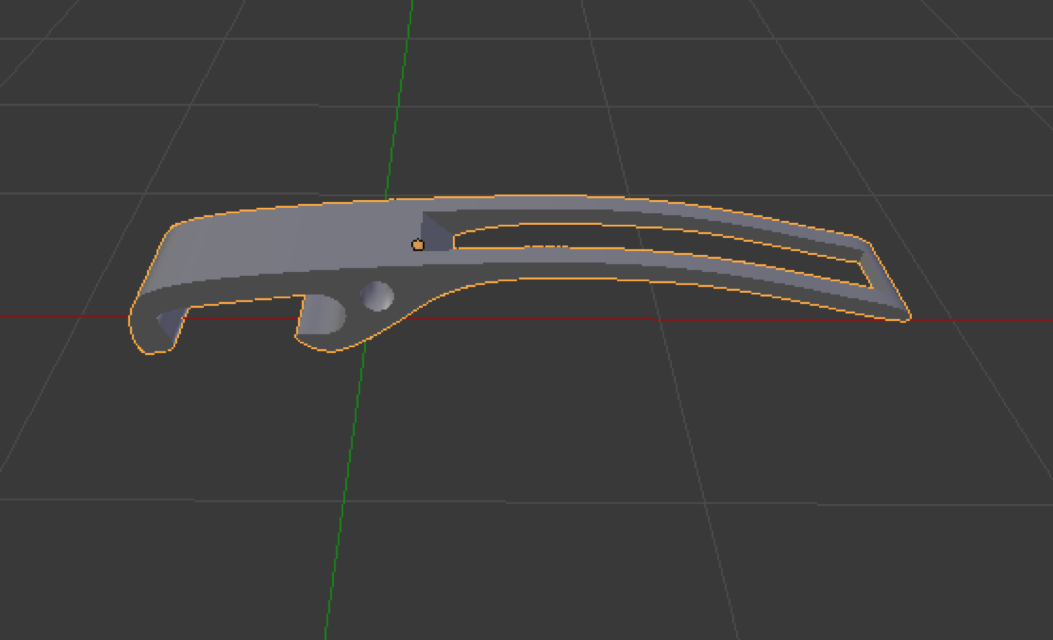
Initially I thought the process would be easy: make a quick model, upload to Shapeways, order a prototype for myself and make it for sale. As anyone who has created a product from scratch would know, it is never that simple. After firing up Blender and recalling how to 3d model I was fairly happy with my prototype: the model looked like a bottle opener, it had a hole in the handle to reduce material and add to a keychain. After then uploading to the site I realized that I broke one of initial goals: it cost around $35, more than my plan of under $30 . Back to the drawing board.
When making a 3d printed product the easiest way to reduce the cost of the product is to reduce the amount of material that is being printed. This can be done by making the product itself smaller or by removing material from the product, for example hollowing out a solid object. My bottle opener was already a little smaller in size than the bottle opener I already had attached to my keychain, so I was a little worried about making it smaller. However, I took another look at the design of the product and found a few places where I could easily remove some material in the handle and in the opener head. So I was able to remove a large portion of material from the handle while still keeping the overall shape of the model.

Before Removing Excess Material
After Removing Excess Material
With version 2 ready, I upload and see that the price is now under $30, while still allowing the model to be printed in stainless steel and cast metals. Awesome! This is the part where I wanted to make my bottle opener for sale to the world and wait for people to start buying. However, working at Shapeways and all of the challenges with making sure products are printable and functional, I couldn’t just leave it there.
How do I know if this thing actually works? What if it is too small? What if it snaps in half when someone tries to use it? I had to order a prototype for myself first and check the integrity of the model. I ordered my first prototype in White Strong and Flexible Plastic, as it has a shorter lead time and is cheaper, making the prototyping process faster than with Stainless Steel.
After waiting about a week for my prototype to arrive I was ready to unbox and test. I checked the bottle opener all over for design imperfections. I held it in my hand and of course I tested it out on a bottle. I did not actually expect the plastic prototype to be able to open the bottle since the material is way too flexible (in fact the handle easily bent in my hand), but I needed to check was how it fit onto a bottle. Does it catch on to the cap how I expect? Unfortunately, this prototype did not. The opener was not curved enough to fit on the cap exactly as I would have liked, so back to the drawing board to curve the model up a little.

Non-Fitting Bottle Opener

After Curving Model
Great, version 3 now ready, back to the site to upload and check pricing and printability. Everything here is perfect again and in fact the price dropped slightly on this new version since curving the opener made the bounding box a little smaller. I again printed another prototype in White Strong and Flexible Plastic. Another week later I received the new prototype and gave it the same checking over I did the first. This time however, it fit much better on the bottle opener, perfect.
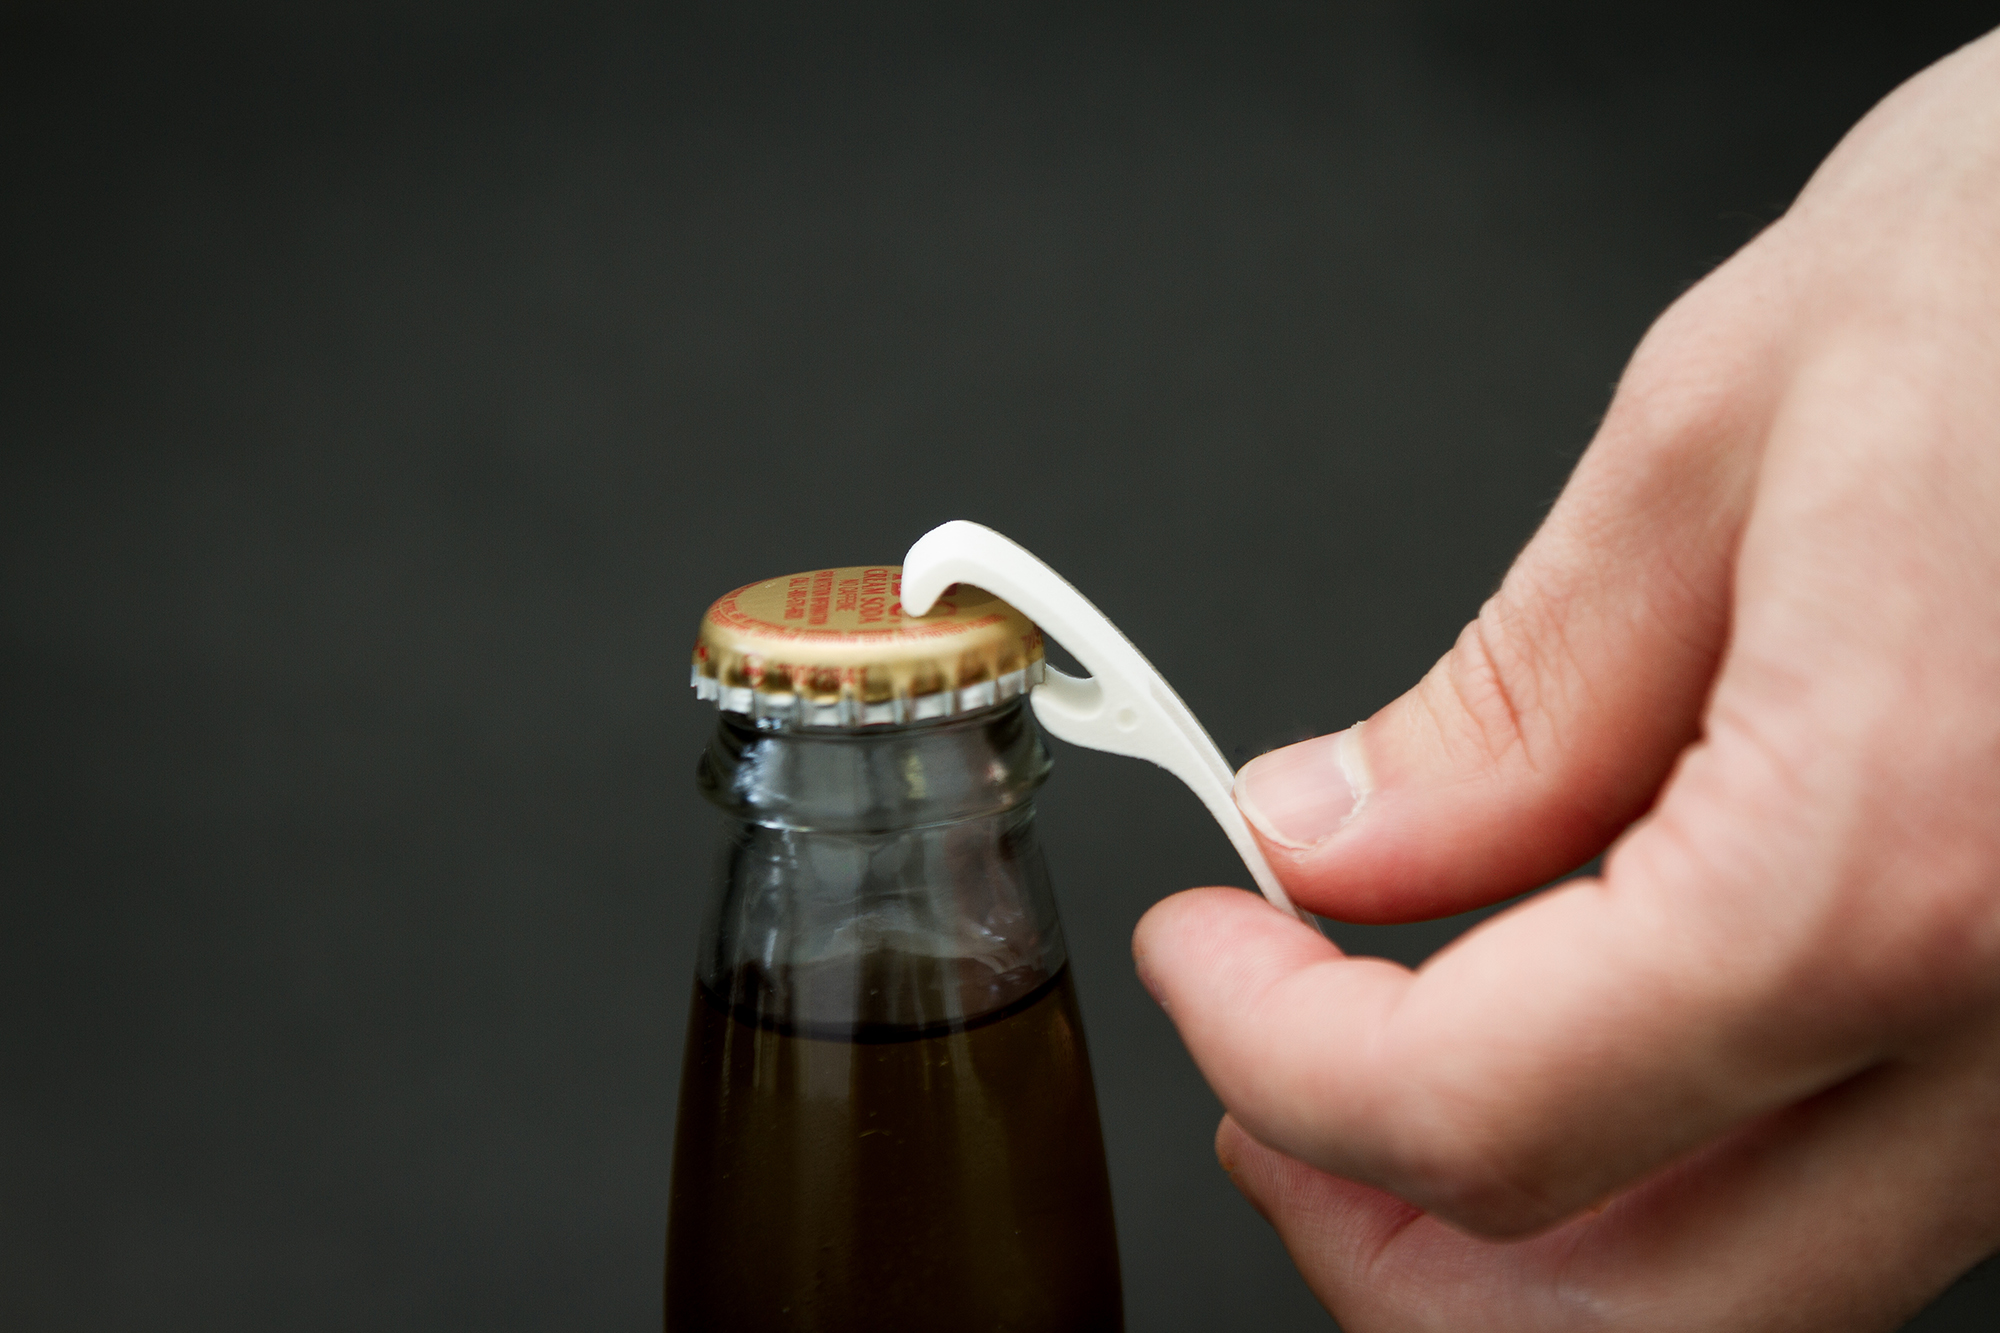
Fitting Bottle Opener
Now this is where I wanted to just enable the product for sale to all. I was able to print it, the design seems like it works and it is in the price I wanted. However all that I have done was still not enough. I needed to order a test print in the target material family I wanted to enable for sale. I knew the product would never cut it in the plastics, it would just bend and break, I needed to make sure the same thing didn’t happen when printed in Stainless Steel. So, I ordered the model again, this time in Stainless Steel and again waited for the prototype to arrive.
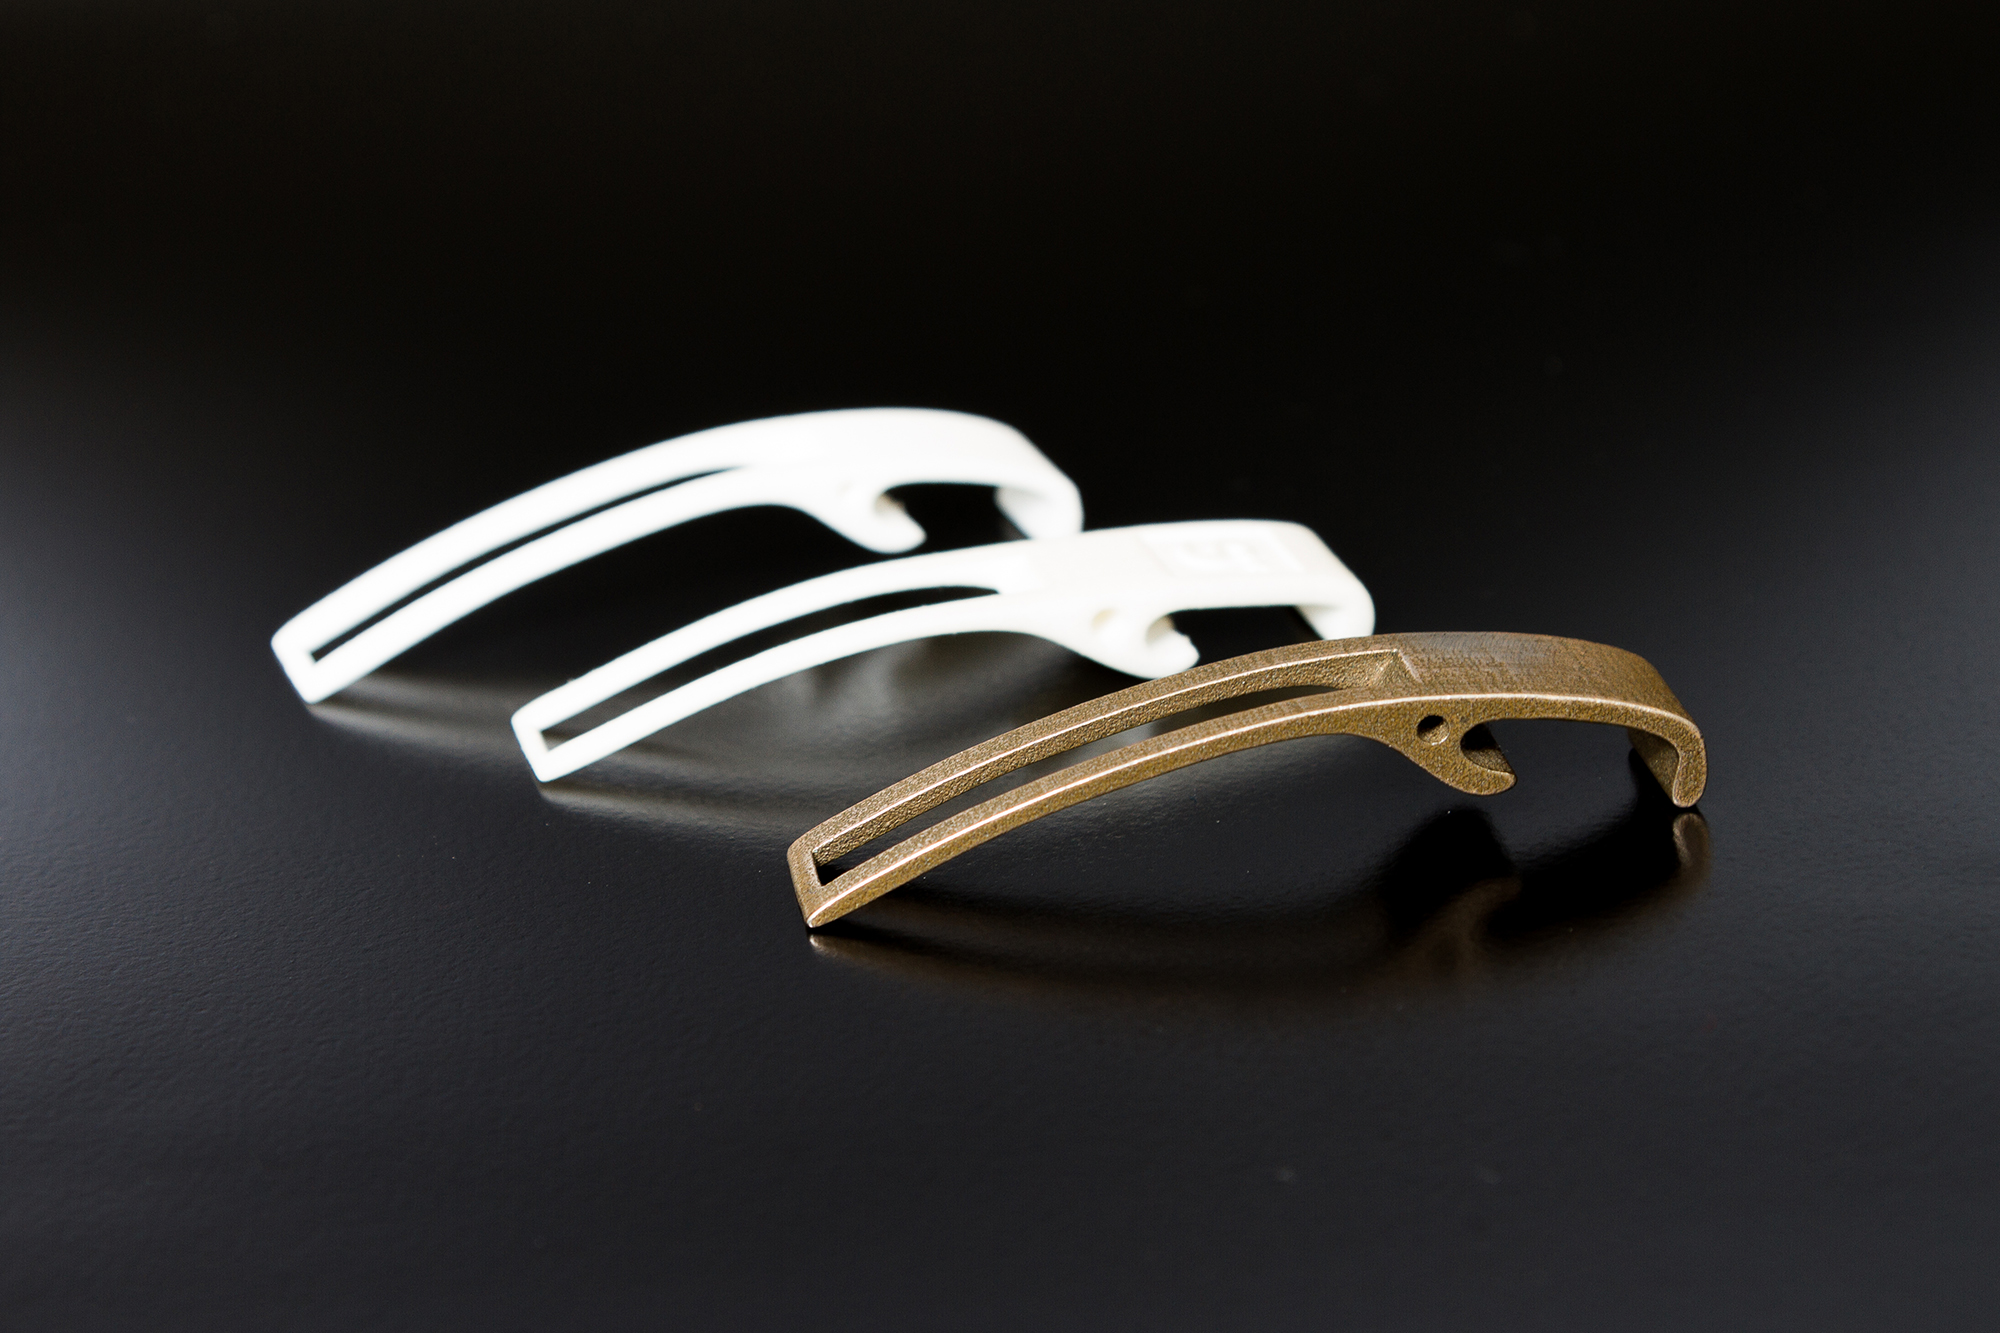
Bottle Opener Progression
The Stainless Steel version in hand and now to give it the same, but more rigorous, checks as the previous 2 prototypes printed. The first and most important test I tried to do was bend it in half and luckily I failed. After trying and trying to break the product I finally gave in and decided to try and open a bottle with it. Success, works as advertised. I now have the final product I was looking for. Having the final working product ready I went right to my account and enabled the product for sale in all of the various offers of Stainless Steel.
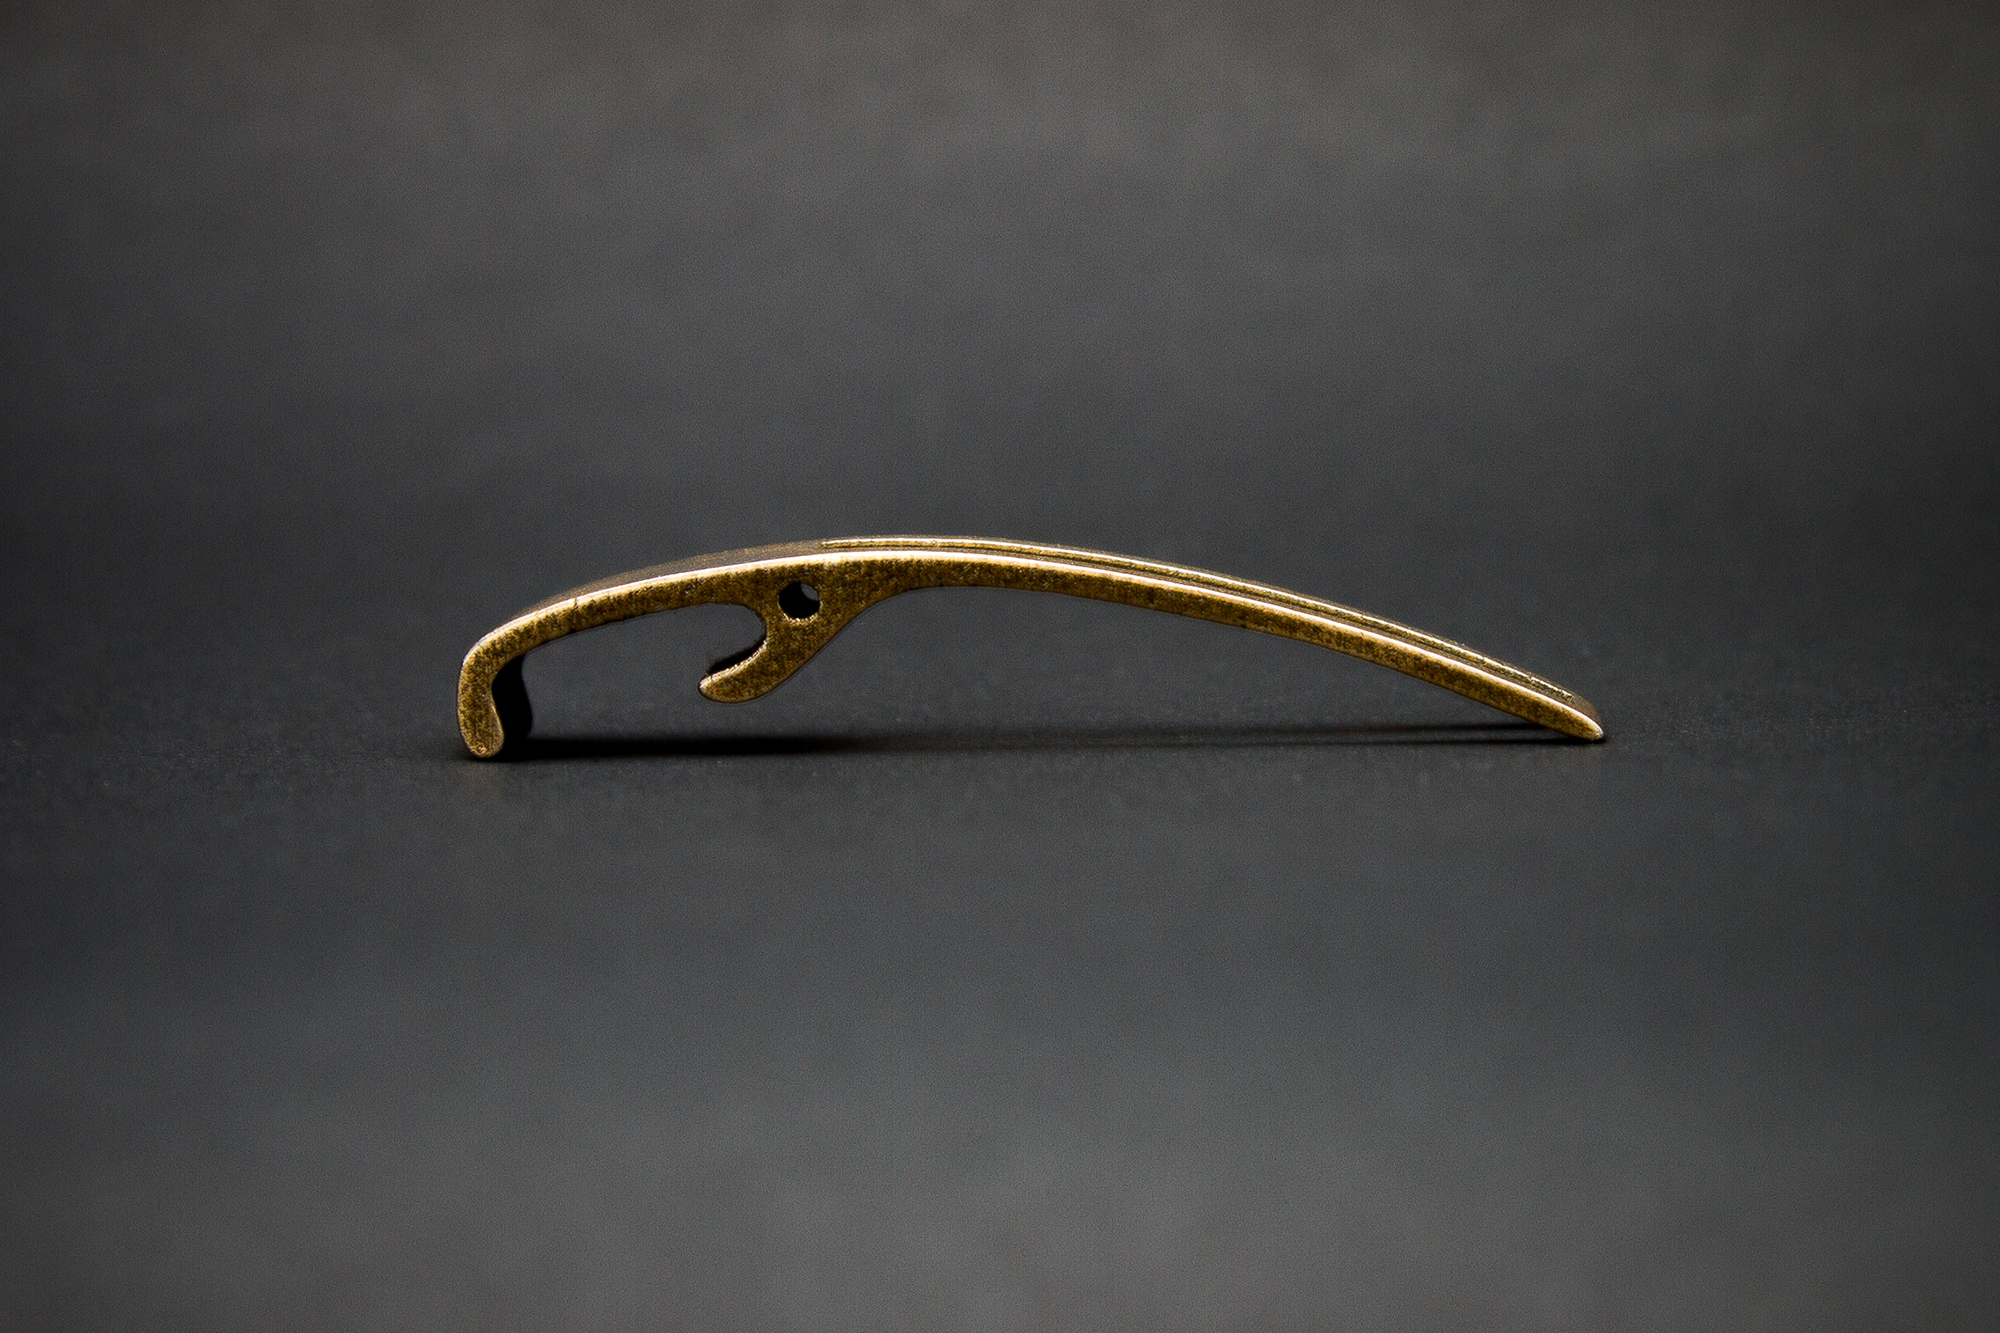
Stainless Steel Bottle Opener
I chose to make my product for sale just in the Stainless Steels as they share the same printing process, so I knew if one worked well and was printable that print success rate is shared among all stainless steel materials. I could have also made available for sale in the Precious Metals, but I was not confident in their ability to print and be functional without ordering a prototype for myself and the price of a test print in gold or platinum slightly higher than I was willing to spend. However, luckily enough for me, I had a co-worker who loved the design of my bottle opener and wanted to order it in Raw Bronze. I was a little worried since I have heard the material is softer than stainless steel, but my co-worker was more than willing to be the first to try my design in raw bronze.
A few weeks later after my co-worker received his print of the product we gave it a try. It looked beautiful! We were excited to try it out and we soon discovered remembered why it is important to test in many materials– the handle was too thin for bronze and bent the opener instead of opening the bottle. I felt bad that he went out of his way to help me try my product in a new material and it did not work. I wanted to fix it for not just him but anyone else who might want to purchase in one of the Precious Metals, so I went back to create a new version with a slightly thicker handle, I uploaded and ordered for myself in Raw Bronze to see if I fixed the issue.
Another few weeks later after receiving my new version in Raw Bronze, time to test. Unfortunately again the handle was too thin and it bent easily, less easily than the last, but still much more than anyone would want for a bottle opener. I then decided to give up on trying for the Precious Metals. It would be nice to be able to have my product printable in those materials I would have to again make the handle thicker to try and get it to work which would continue to raise the price of the model which was something I wanted to steer away from.
However, at last I now have what I am calling my final product. A design that meets all of the original goals I set out to accomplish which is also printable and functional for the end user. Even though I now have this “finished” product for sale I am not done quite yet. I am still awaiting for both good and bad feedback from shoppers on how I can continually iterate on this design to make the product better and better. You can see my final product here: Keychain Bottle Opener.
When I started this adventure I assumed having the idea was the hardest part of the process. I didn’t yet recognize all of the necessary steps for making a good product. Product development is not a linear process. It is iterative and usually requires more than one attempt to get everything perfect. This process can easily be both time consuming and expensive depending on what you are trying to make. I personally decided to take on this entire iterative trial and error design process by myself, but the good news is you do not have to go it alone. Now with features like Beta Products Shapeways is working to make that iterative process more collaborative between designers, shop owners and shoppers. As I found out, collaboration and feedback helped me make a better product. Have you bought a product on Shapeways and offered the designer feedback? For designers, how have you further refined a product based on user testing and feedback?