
In the previous post we looked at some basic steps for 3D modeling in 3ds Max for Shapeways, in this tutorial we will have a very basic look at how to output full color VRML files for full color 3D printing with Shapeways using 3ds Max. In this tutorial we will be demonstrating in 3ds Max 2011 which is available for free download for current students (perfect for any students wanting to submit there designs for the Full Color 3D Print Student Contest which is closing at the end of May 2010).
Read on for a basic step by step tutorial with a simple projection map, if the Shapeways community is interested we will also look at more complex color mapping, and of course if anyone has any more tips please do share them with us.
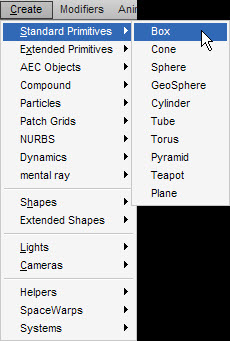
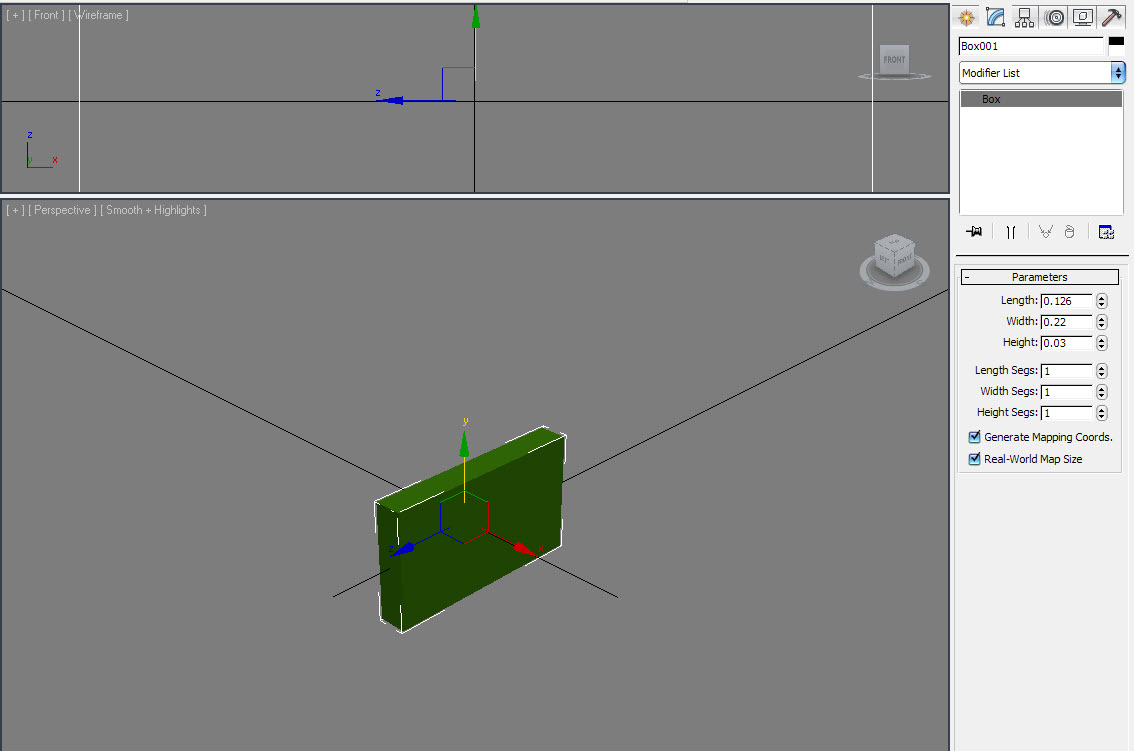
Step 1. Fire up 3ds Max and Create>Standard Primitives>Box drag yourself a basic box then use the Parameters in the right hand side toolbar enter Length 0.126 Width 0.22 Height 0.03. We are using such small numbers because the VRML file format we will be exporting to reads the units in 3ds Max as meters, great for a virtual reality environment such as Second Life or an Architectural walk through, not so great for 3D printing where such small increments can cause issues with non manifold objects and repairing watertightness. The size/ratio of the box is dictated by the ratio of the image we will map onto it next.
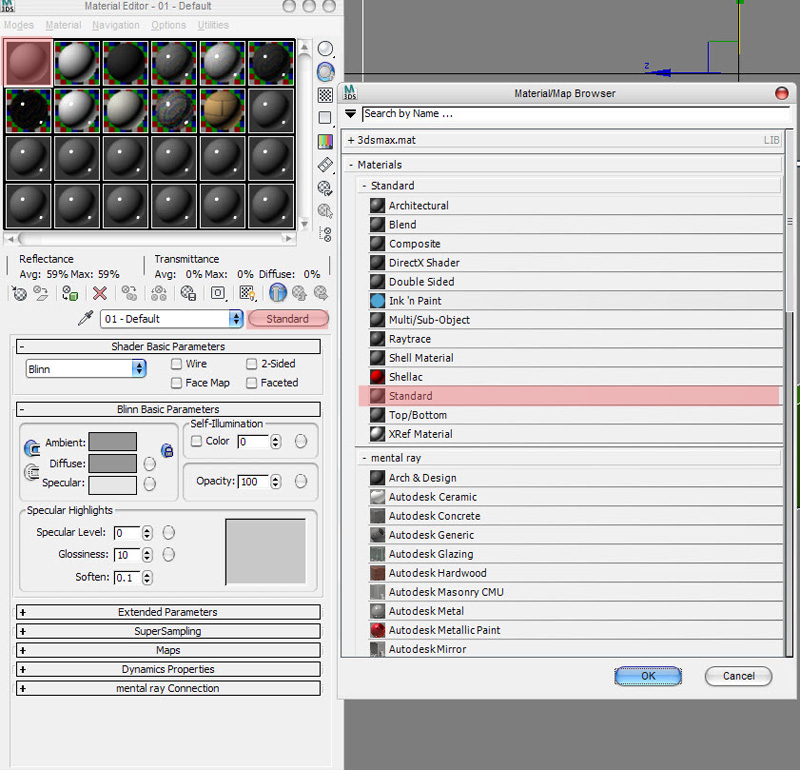
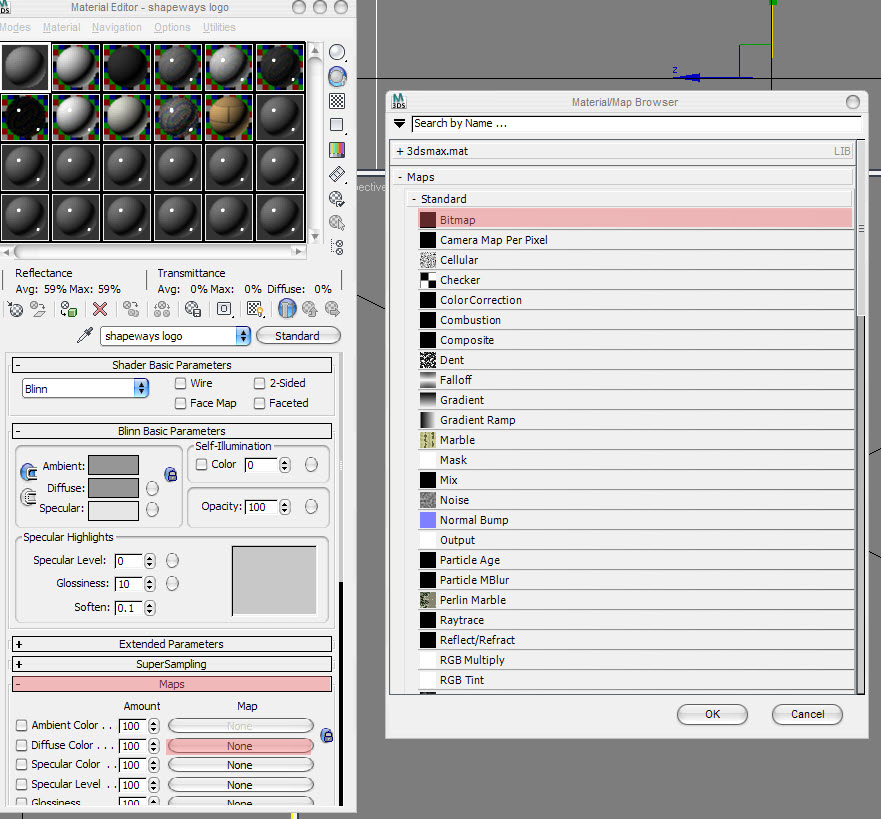
Step 2. Next we are going to create the full color material to attach to our box by opening Rendering>Material Editor>Compact Material Editor. Then click on one of the preview balls (top right for simplicity), material type Standard>Standard (insert lame joke about having double standards here).

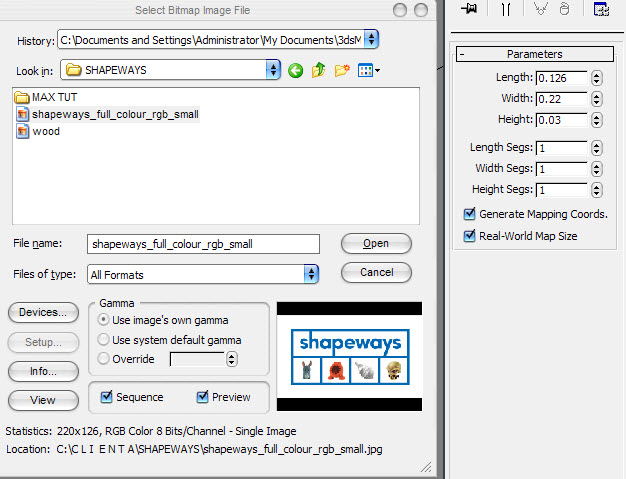
Step 3. We now need to map the image we are going to project onto the box, for a VRML file to be uploaded to Shapeways it must have the image you use for the map in the same folder as where you save the VRML file, they will then need to be zipped together to upload to Shapeways. To prepare for this I located the image I would like to map in a suitable folder (or if you have a really messy workflow just put it on your desktop). Now Material Editor>Maps>Diffuse Color>Bitmap will then prompt you to chose an image for your custom material to apply to your model. You may notice at the bottom of the dialog box it gives the statistic of the image as being 220×126 pixels which is what we used as the basis of the model size, in tis instance because we will not be tiling the image but only projecting one instance.
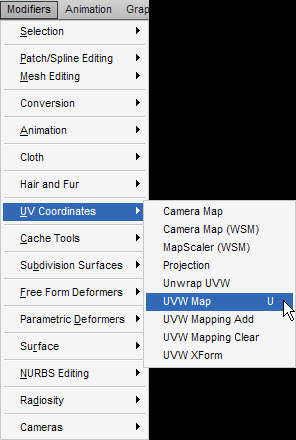
Step 4. Now we have our material we need to dictate how it displays and map it onto the object. First we will need to create a UVW map of the box by choosing Modifiers>UV Coordinates>UVW Map. In this instance we then leave the map Parameter as Planar, the Length and Width should correlate to the box size and Deselect Real-World Map Size. (other users may have had more joy with this but I have found it a little painful, but I am willing to learn if any Shapeways users have any tips to add).
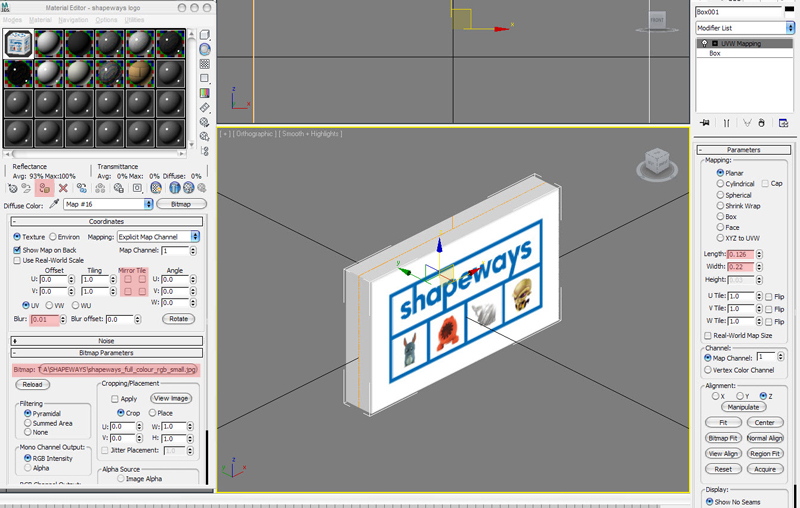
Step 4a. In the Material Editor you will need to Apply Material to the box,Deselect Real-World Map Size, Deselect Mirror & Tile options and set Blur to 0.1. You will also be able to see the Bitmap parameters which you can tweak if you need to crop or rotate your image. You should now also be able to see the image mapped onto your box. If you are having troubles seeing the box in the Perspective Viewport change it to Orthographic by pressing O or right clicking in the top left corner of the viewport. Because of the crazily small scale we are forced to use to output VRML the perspective window can some times fail to see the object properly.
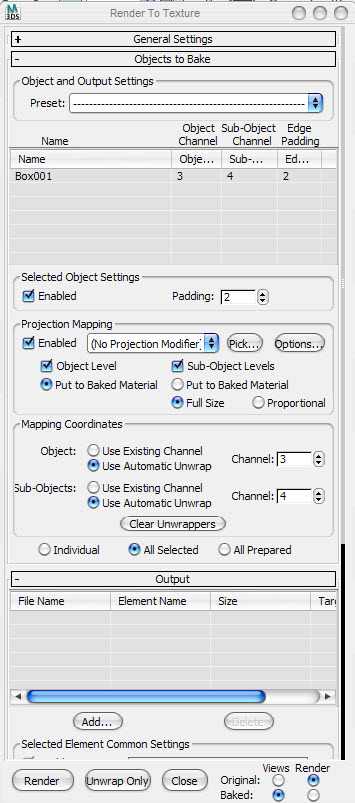
Step 5. Now we need to bake the material onto the object with Rendering>Render To Texture, in Objects to Bake you should see your Box and importantly in this instance ensure that the Projection Mapping is Enabled then you can Render the object.
Step 6. Now we have a box with the map ‘baked’ into the geometry we can output the file as a VRML by choosing File>Export and selecting file type VRML97 and ensuring you save the file in the Same Location as the image used in your material!
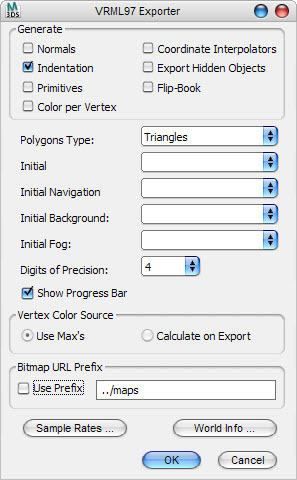
Once you have chosen the location you will be presented with the VRML97 Exporter Dialog, here it is best practice to Deselect Primitives and also Deselect Bitmap Url Prefix>Use Prefix. This is a way to locate external maps but it does not currently work with Shapeways Full Color 3D Printing.


Step 7. Now you have your VRML file and your Bitmap you need to ZIP them together to then upload them to Shapeways ensuring that you tick Has Color but you do not need to select a Scale as mention previously 1 VRML unit = 1 Metre, if your models turn out to be incredibly expensive it is most likely this issue..

OK, success, you can now upload full color 3d models to Shapeways, if you are a student go get your free copy of 3ds Max now and enter the Student Contest. If you have any 3ds Max tips please share either here or in the forum. If you are interested in seeing more complex mapping or modeling tutorial for 3ds Max or other CAD software shoot me an email at duann(at)shapeways.com telling us what you would like to see.
![]()