
As a small child, I desperately wanted a puppy — so much so that I had a little blue purse with a long strap that I named “Purse Dog” (I wasn’t great with wordplay back then). I dragged Purse Dog around the house by the strap and tied her to the end of my bed at night so she wouldn’t run away.
That sounds so damn cute and tragic that I’m actually a little shocked that my parents didn’t run out immediately and buy me fifteen puppies. But as the years wore on, the closest we got to having a dog was a pair of Tekno Dogs given to my sisters for Christmas and an antisocial rabbit named Smacky, and I lost interest in canine companionship. I didn’t necessarily dislike dogs, but my lack of experience made me a little skittish around them, and I wasn’t super in love with the idea of picking up poop for 10-15 years.
Then I met Nick, and he, from the beginning of our relationship, started describing a future that included all SORTS of animal roommates (goats, chickens, peacocks…), and the whole dog thing started to seem like a pretty good compromise. When we were planning our wedding, I would say something like, “Can you believe it’s only 60 days until our wedding?” and Nick would counter with, “Yeah, but can you believe in 90 days we’re getting a dog?” It took all my willpower not to punch him in the throat when he responded that way (note: violence is never the answer), but the writing was on the wall: this puppy thing was happening.
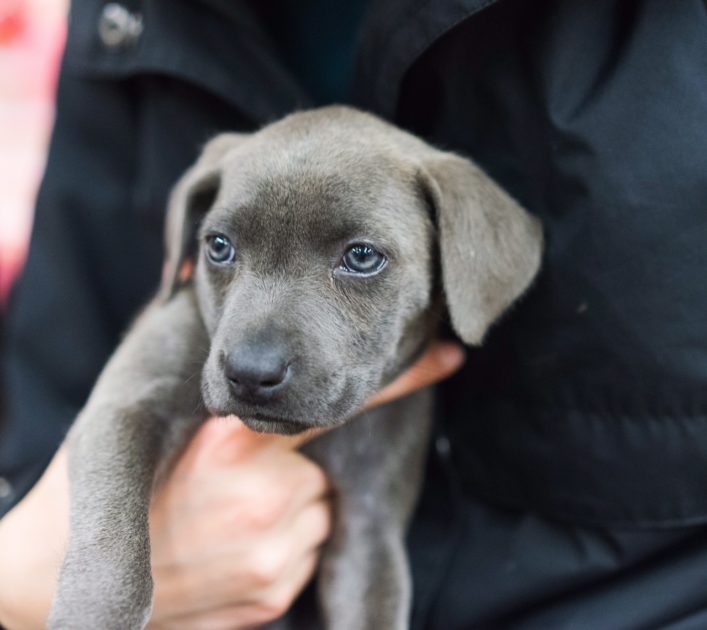
Much to Nick’s chagrin, it took longer than 30 days to procure said puppy — quite a bit longer. But a little over four weeks ago, we met a tiny little mutt named Gray. She was the runt of her litter, and even my somewhat-dog-apathetic-looking-ass almost cried, overwhelmed at her cuteness, when she emerged from her carrier, all five pounds of slate-colored coat and misty gray eyes of her. We signed the papers and rechristened her Blanche Dogereaux.
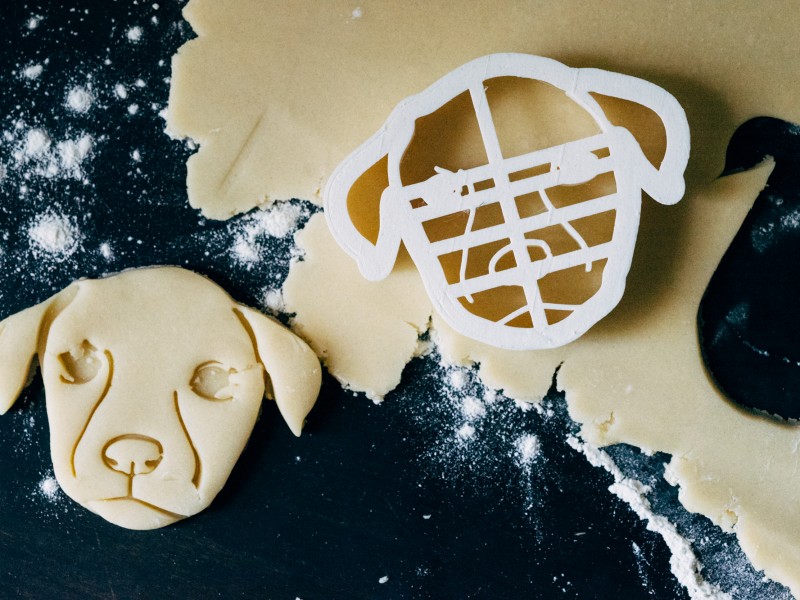
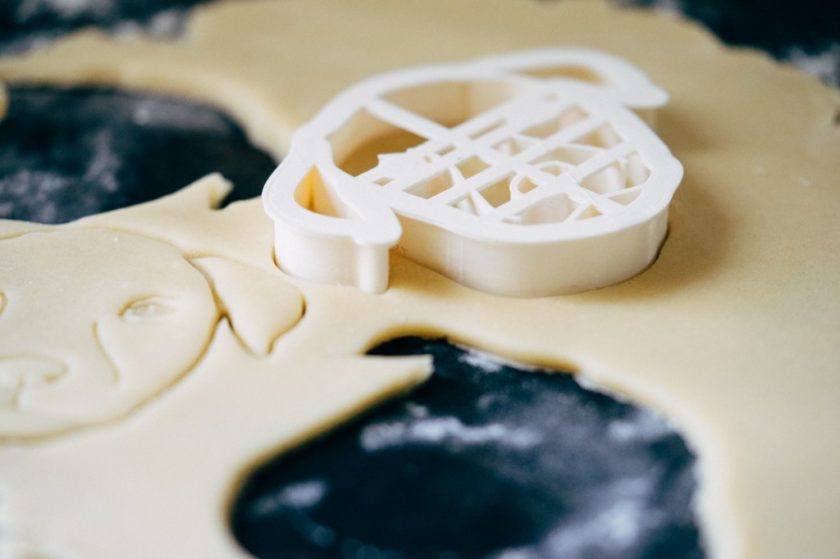
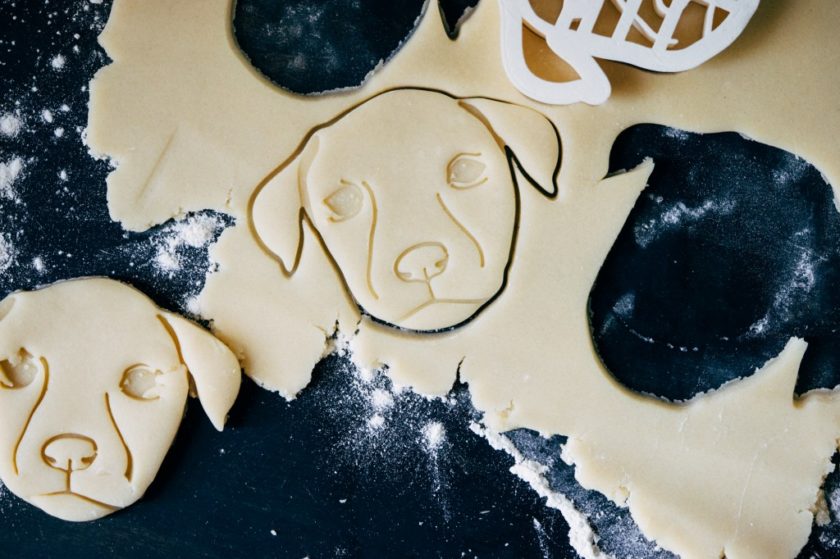
We had to wait a week before we brought her home, and to occupy the time, I decided I needed to welcome her to our family the only way I knew how: with a custom 3D printed knick-knack. A cookie cutter of her face seemed appropriate, as it both would forever crystallize her puppyhood AND cement my transition from care-free normal person into crazed, overbearing dog mom. I mean, Blanche is the Beyoncé of dogs, no doubt. She slays, ok? If that makes me Tina, so be it.
But back to cookie cutters.
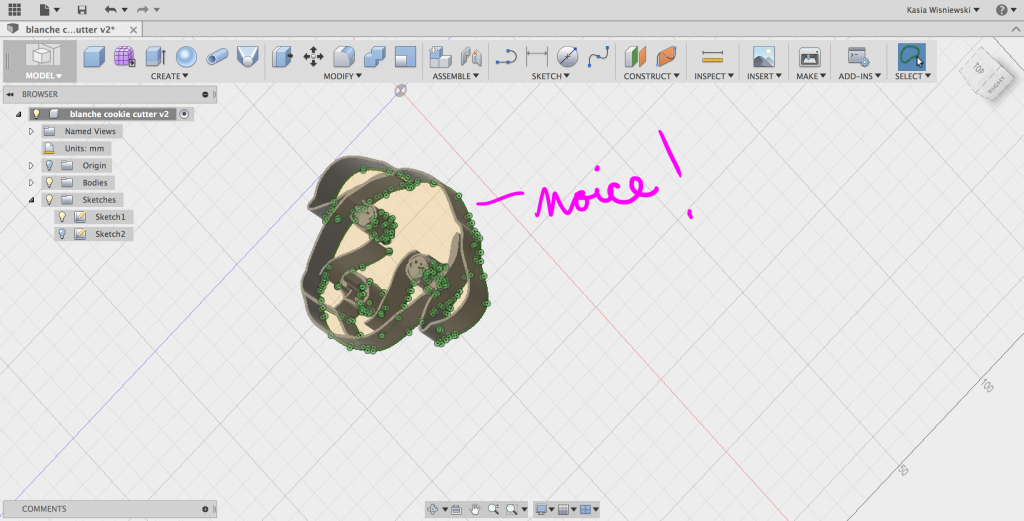
The hardest part of this project is just drawing your design. Once that’s ready, it only takes about 10 minutes to model it into a cookie cutter. And of course, you can use this same technique to make a cookie cutter of ANYTHING. Your face. Your sister’s face. Your home state. Your house. A lung. Anything. Go wild.
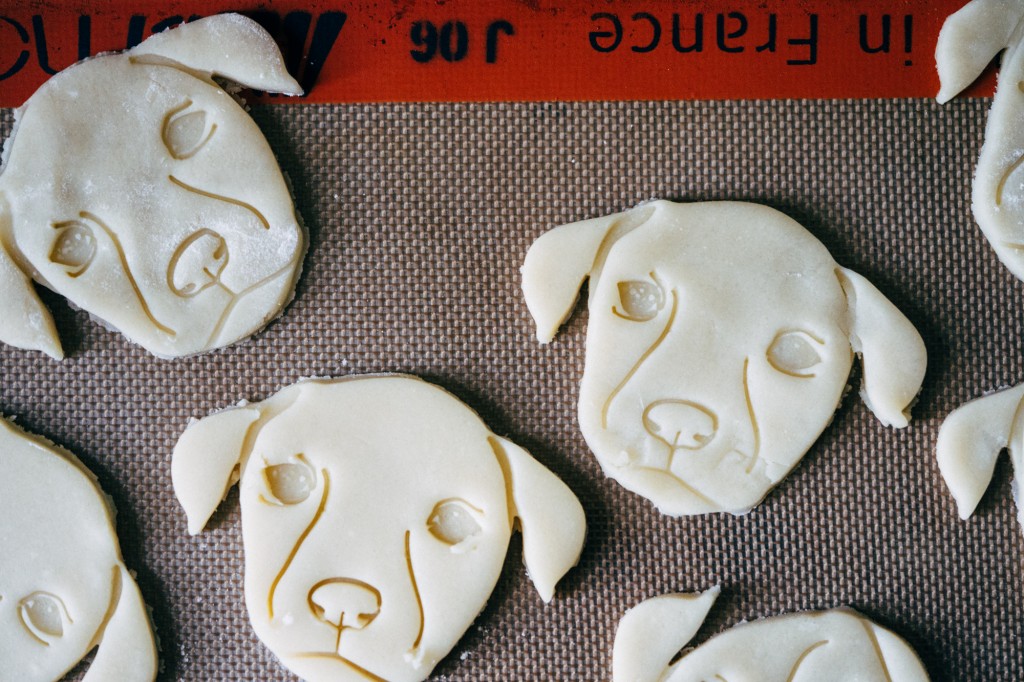
It took 3 weeks for me to actually USE said cookie cutter, because it turns out that puppies are basically just little demons in very, very cute bodies that love nothing more than screaming at you when you try to do something other than pay attention to them. But as you can see in the photos, the cookies are pretty effing cute. Of course, in the 3 weeks since we brought Blanche home, she’s changed so much that the cookie cutter now only bears a passing resemblance to her… another lesson in procrastination, courtesy of Kash.
CUSTOM COOKIE CUTTER: BLANCHE DOGEREAUX EDITION
- Time: <30 minutes
- Level: Beginner
- Software used: Drawing program like Illustrator, Fusion 360
- Approximate cost to print (Based on 4″ cookie cutter)-
- Shapeways: approximately $25-30 in white nylon.
- Using your own 3D printer: Filament cost is approximately $2-3
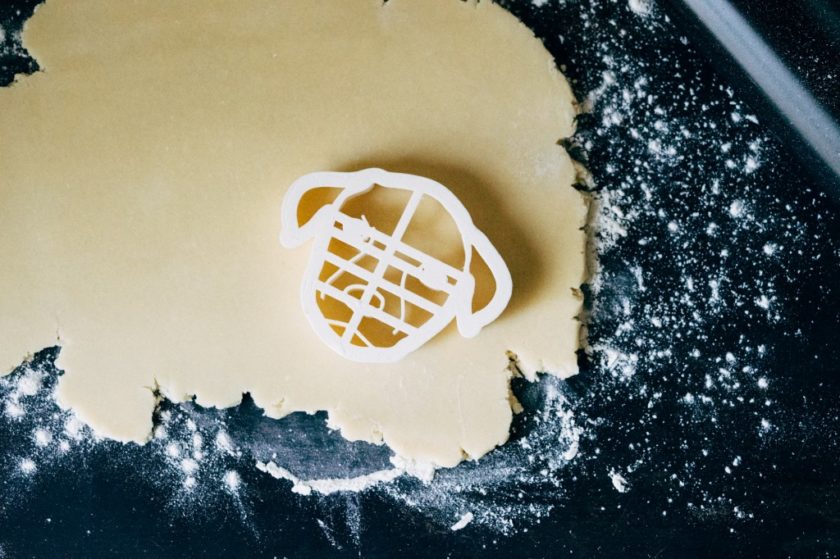
Step 1: Drawing your design
We’re going to end up with 3 SVG files in total, which will be known, going forward, as follows:
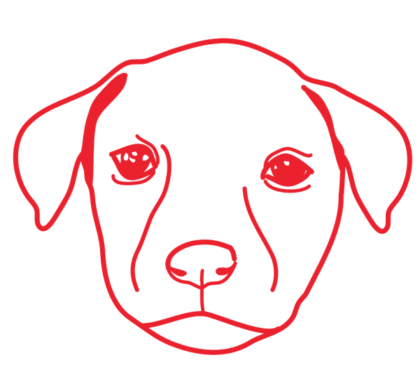
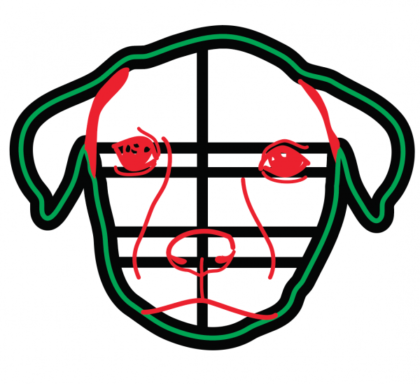
- The Details
- The Outline
- The Handle
Start by drawing your motif. As you might have noticed by now, I like to do this digitally with a drawing tablet and Illustrator, but you can do this by hand and scan in if you prefer- just be ready to do a few more steps.
Generally speaking, you’ll want your outline to be the thickest line weight, with the inner details in variable width. For me, that was a 3.5 pt outer line weight, with the details varying from 1.5 pt to 2.5pt. Whatever looks good.
Once your base drawing is done, you’re going to save 3 copies. Don’t move your drawing around within the artboard- keep it in one place to make your life easier in a few steps.
Copy one will be the whole drawing- this will be the Details file (above, all red). You can either keep or delete your Outline- I elected to keep it. All you need to do here is expand, combine, and save as an SVG (note: if you’re using Illustrator, don’t use the “export” version of SVG- use the “save as.” For some reason, the exported SVG doesn’t play nice with Fusion.
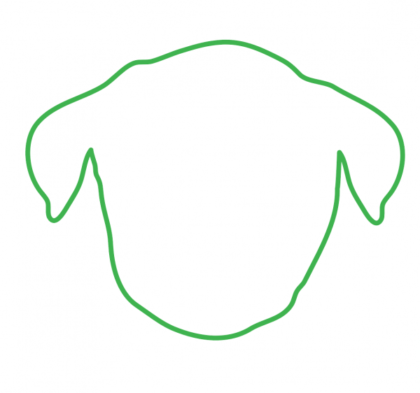
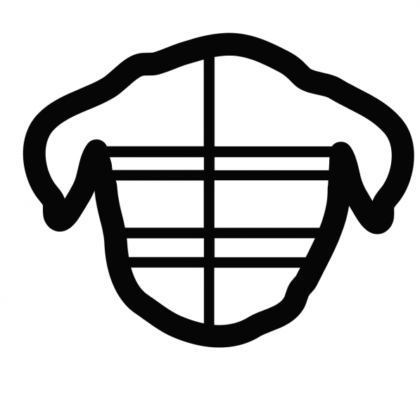
For Copy 2 (The Outline- Green), delete everything EXCEPT the outline. Increase your line weight by half a point from what you were using before (3.5 to 4, for example). Expand the outline so that it’s one smooth, connected line, and save as an SVG.
For Copy 3 (The Handle- Black) , start by increasing the line weight of the outline a bunch — 15 pts or so. This will be your handle. Next, draw horizontal and vertical lines (line weight should be somewhere between 5-10 pts) across the details — you’re going to want every “floating” detail (eyes, nose, etc-anything not connected to the outline ) to be touching a line. Once everything is accounted for, delete everything except the newly thickened outline and the horizontal and vertical bars. Expand, combine, and save as an SVG.
STEP 2: Extruding your drawings
Start a new Fusion 360 document. Save.
Mouse over to “insert SVG,” choose your plane, and select and place the Details file (make sure to scale to the appropriate size — although with cookies, I believe anything is fair game. I did about 4″ across- a nice, big, almost mall-sized cookie). For more in-depth information on placing and scaling SVG files, take a look at this project.
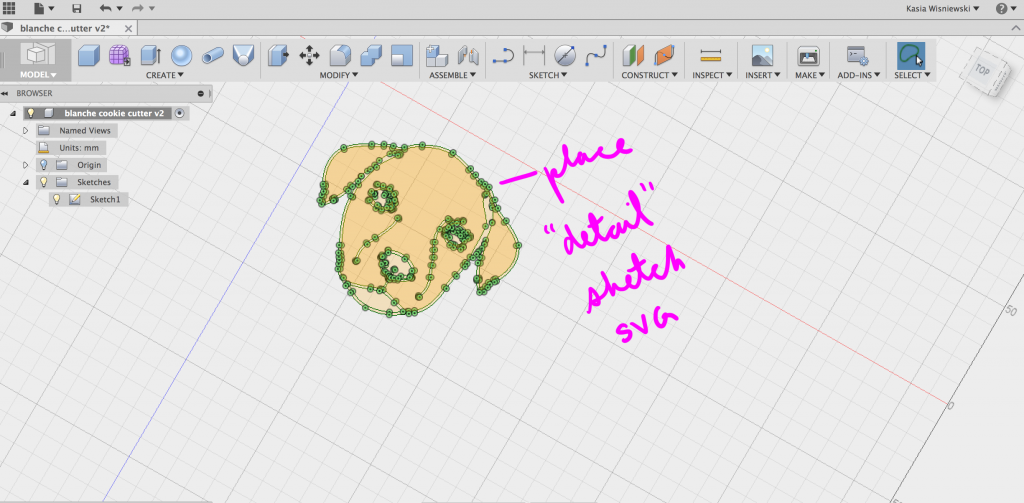
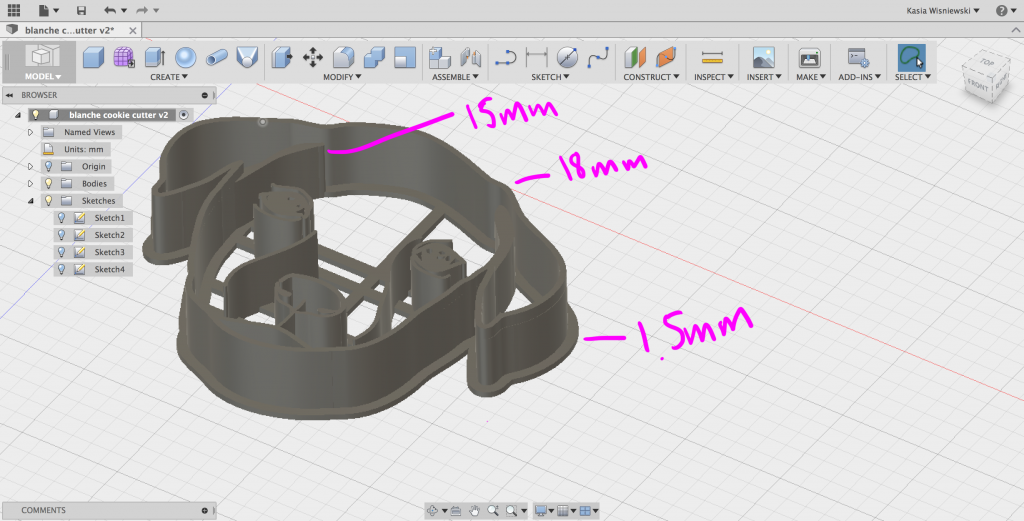
Select all the details and EXTRUDE. This can be whatever height you want, but I opted for 15mm.
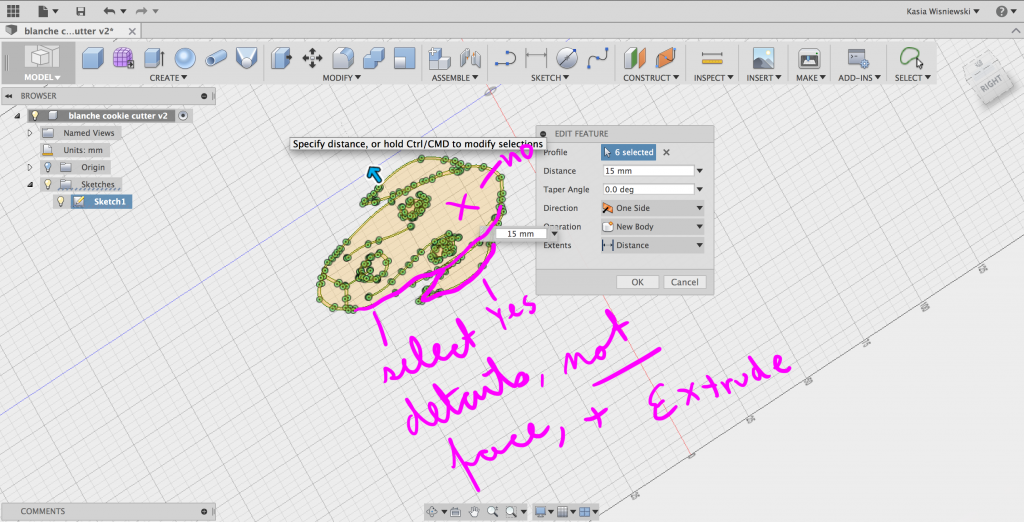
Next, insert another SVG — this time, the outline. If you scale it to the same size as the Details file, and you didn’t move your image around in the artboard in your original file, the inserted SVG should be positioned perfectly with your details. Now, extrude the outline; this time, you’ll make it a few millimeters taller. I added 3 mm, for a total of 18mm.
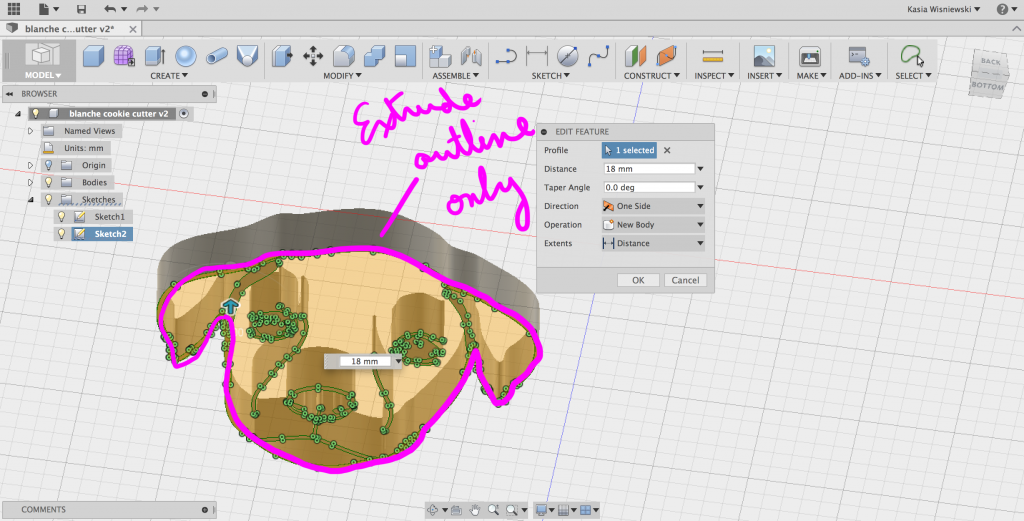
Now, typically when you extrude a new sketch over an existing extruded area, it will default to cutting away the original body using the new body. It this happens, simply change the function from “Cut” to “New Body.”
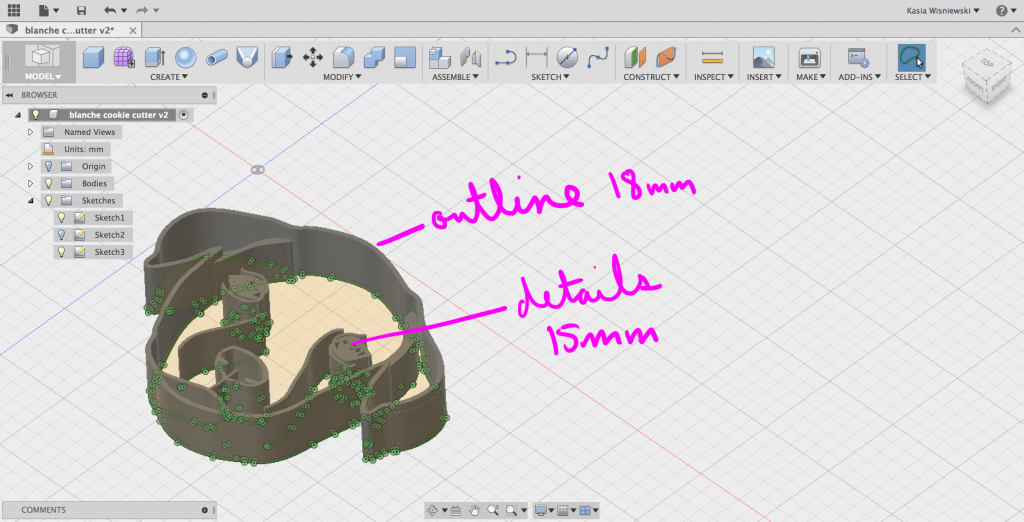
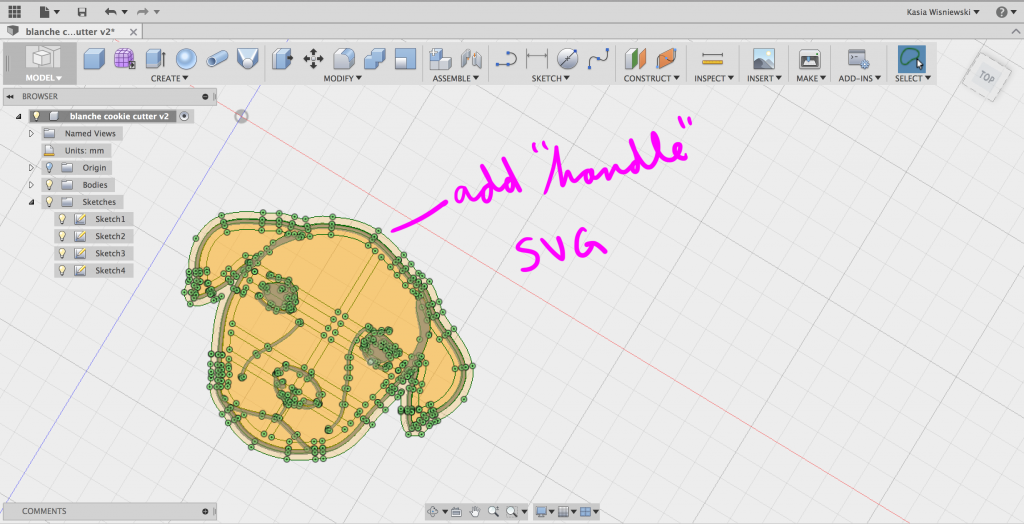
We now have our details and our cutting edge. The final step is to add our handle.
Insert the final SVG into the workspace- again, on the same plane. Extrude the handle 1 or 1.5mm, and again, make sure the Extrude function is creating a new body rather than cutting away.

Step 3: Combine
Select all the bodies and combine. Now you’re ready to print!
Step 4: Print
I printed this at home on our printer in white PLA. Because PLA is harder and more traditionally plastic-y than sintered nylon, it seemed like a better fit for a cookie cutter. You can get your own cookie cutter printed in PLA from Shapeways if you don’t have your own 3D printer.
Step 5: Get really busy and overwhelmed while trying to take care of your brand new baby puppy, let 3 weeks elapse, and finally make cookies. Take pictures while you’re rolling them out, but then eat them all before taking any pictures of the final product.
Last note: Take a look at my previous post about 3D printing and food safety. If you want to be super careful, lay a sheet of plastic wrap over your dough and use the cutter over it. I like to live dangerously so I did not do that.
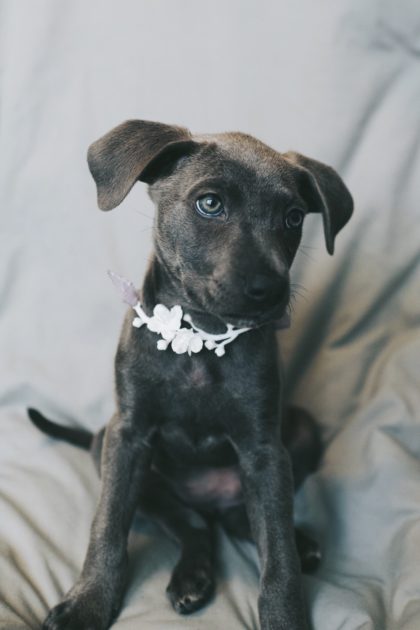
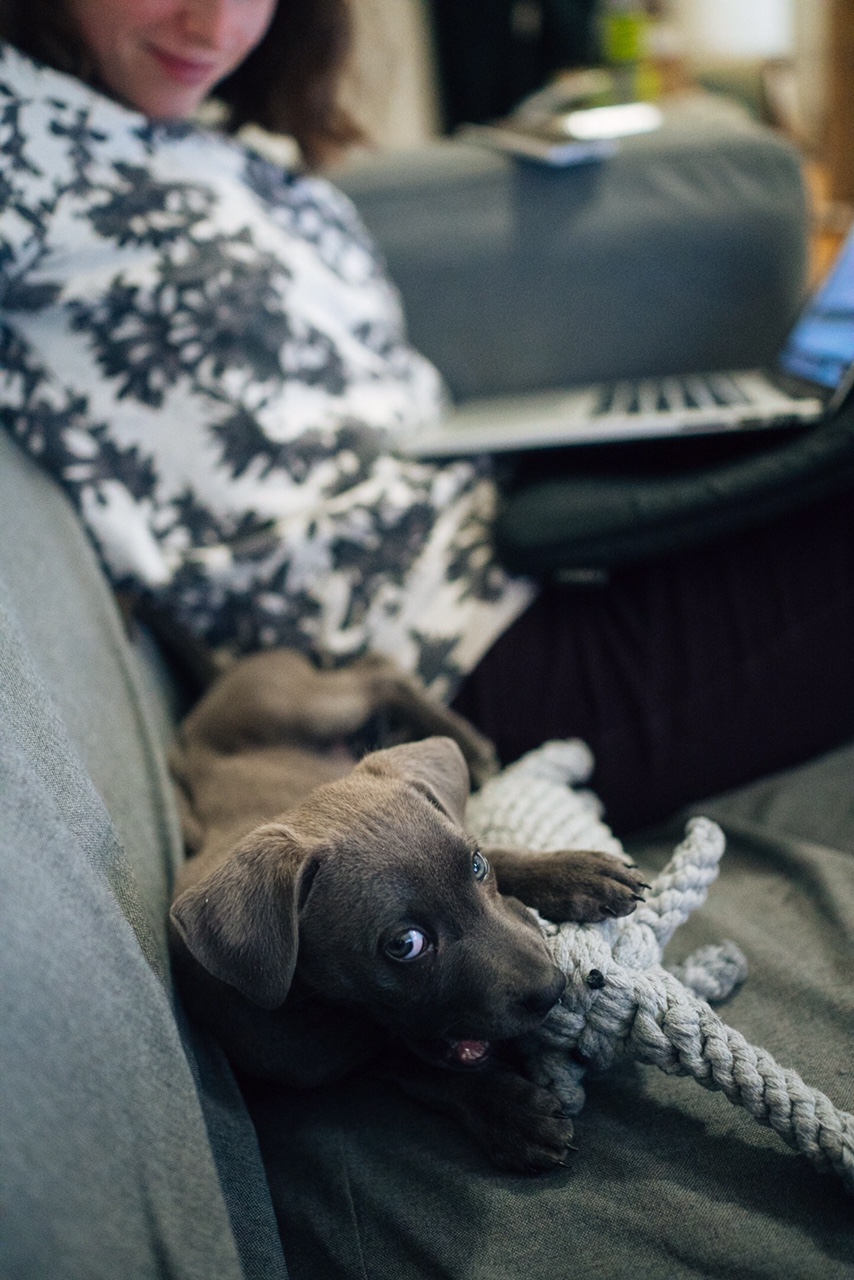
Bonus puppy picture:
This article was reprinted with permission from Beulah.
Kasia is an accessories and jewelry designer who runs her store Collected Edition in our Marketplace and writes for the blog Beulah, an intersection of DIY, craft, and tech.