
This is the last post in the series about Selective Laser Sintering Nylon. In this post I’m going to address the challenge of the cost of 3D printing in nylon and how to minimize it. Yes, we want to make it as affordable as possible for you to make your awesome designs come to life!
If you haven’t read the first and second posts, I would highly recommend that you do. I’m assuming you know some of the concepts introduced there.
To understand the costs involved in 3D printing using SLS, lets have a look at the process, which can be broken down into the following steps:
- Checking the design
- Planning the printing trays
- 3D printing
- Extracting the parts
- Cleaning the parts
- Sorting the parts
- Postprocessing (tumbling, dyeing, sorting)
- Shipping
Each of those steps has associated costs in labor involved in the process, machine cost and material cost. Let’s go through the steps and have a look at the cost drivers.
Checking. At checking, we need to evaluate every new file ordered to see if we can make it. We use automated checks, but a final human check is still required to get the best results. It’s actually not every file, but we check every part in a file since we are printing physical products and each file may contain multiple parts. As discussed earlier, some files contain hundreds of parts and you can imagine the amount of work involved. The cost involved here is labor, namely the time spent checking each part.
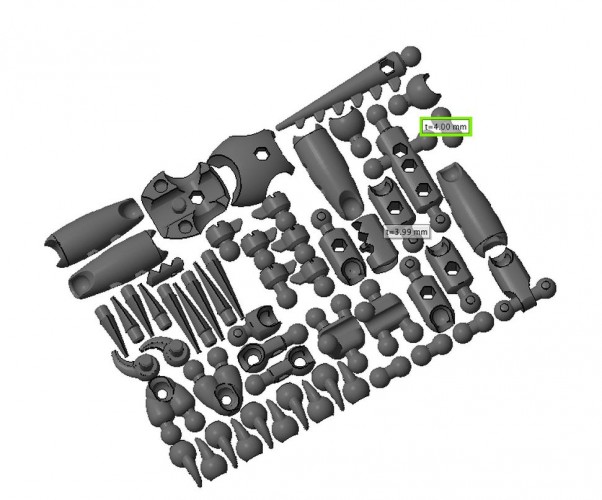
Individually checking the 55 parts in KidMechanos “New! ModiBot RhinoNychus: Reptobeast”
Planning. After checking, we need to plan all checked parts in the 3D printer trays. We want to plan as many parts as possible in a tray, since the cost to run a printer is pretty much fixed regardless of the amount of parts. Today, we run over 20 printers every day and each print on average has over 100 parts per tray, so you can see how packing becomes a challenge. However every extra part we can cram in the tray, reduces machine cost. The packing process itself requires an hour or two of of work and some 10-20 minutes of computer calculations to optimize.
The cost involved in planning is labor, or the time spent selecting the right parts for each tray

62 models packed into a single tray of our smallest printer
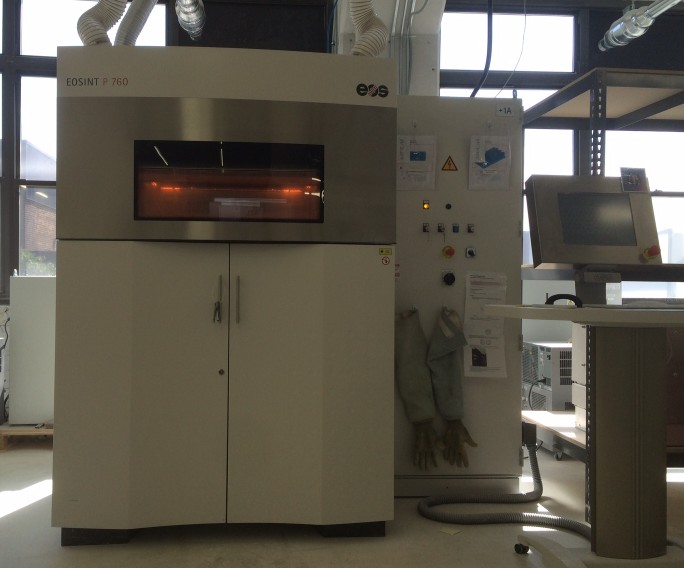
3D printing. Step 3 is the printing process. When a printer finishes it’s previous job,we make sure we are ready to quickly remove the ready tray, clean the machine and refill the powder. Ensuring the printer starts running as soon as possible after it’s previous job is complete reduces cost further. The printer costs money whether you use it or not (from a business perspective this is called depreciation), so running it all the time and thereby maximizing the amount of products made every month is the only way to reduce cost. The complexity of the products or the size has almost no impact on the print time. The most important driver of the time a build needs is the height of the tray. The machines can print roughly 1cm (or 0.4″) per hour. To limit the time it takes to print we try to build trays that are no higher than 25cm. This conveniently means we run the printers with 1 job every day.
Another element of the print cost is the amount of powder used. If the printer is completely empty it would still build layer upon layer of powder. As the powder is heated it ages. The industry standard is to run each build with 50% new and 50% old powder. Each tray has roughly 5% of volume in parts so after each build you are left with 95% old powder. Of this old powder you can re-use 50% in the next build. The material cost is the new powder. Obviously using more old powder reduces material cost, but the problem is that too much old powder will cause the parts to look less defined and sometimes they discolor (orange peel). We (everyone using SLS) need to figure out how to make it possible to reuse all powder since this is the most wasteful part of the process. The cost involved in 3D printing is some labor to clean the machines before each run and mostly machine and powder cost. To calculate actual cost per part is quite difficult, since it depends on the other parts in the tray. Amazingly, if we print a part one week, and then again the next week, it can cost twice as much the second time only because of the other parts in the tray along with it. One of the reasons that we’ve never charged for machine space before is that we had to build up a huge amount of experience to properly control for this and charge you the right price.
Cooling, Cleaning & Sorting. After printing, the tray needs to cool as much time as it has printed (again typically 24 hours). And then the break out, cleaning and sorting starts. The costs here are mostly part based since every part needs to be dug out of the powder, cleaned and then made sure it goes into the right box. The cost involved is labor per part. Each part needs to be broken out of the powder, cleaned and then sorted.
Models with many similar looking parts are among the hardest to track and sort properly
Post Processing. The polishing and dyeing process again are mostly labor. The tumbler is fast and can polish many parts a time, so there is almost no machine cost involved. The cost involved is mostly labor. To put the parts in the polisher, remove them and then sort. Or dyeing the parts for a few minutes, remove, let the parts dry and re-sort. Much of the cost of post processing isn’t the processes themselves, but constantly combining and re-sorting the parts at each step.
As you can see, the cost in making a product using SLS can be broken down into 4 main categories:Fixed cost like utilities and rent of the factory; Labor cost to do the actual work involved; Machine cost to pay for machine depreciation; and material cost, based on how much is used.
It’s our challenge to reduce these costs by automating certain parts of the process, make sure the machines are always running, and are run at close to maximum capacity, and that we re-use as much powder as possible. It’s also clear that our cost is based on labor per part, cost of the amount of space the part utilizes in the machine and the amount of actual material consumed.
Next week I will cover how our current price model covers these costs and how we can optimize.
As always, let me know if you have questions or suggestions. In general I like to hear from you!
Pete / CEO Shapeways
This is some great information Pete, thanks! It also makes me feel really sorry for the techs that have to deal with the stuff I design given all the tiny robot parts that my models have :/
Hi, happy you like the info! Don’t be too sorry. We like the challenge and need to figure out a way to make it possible to make anything.
I’m trying to develop plastic support media where the porosity of the plastic is critical (to allow organic vapors to transport across the media). Information from your site suggests that the Strong & Flexible Plastic is porous (paint is easily absorbed, not water tight), which for me is desirable. Do you have the ability to control porosity of a finished part, for example, by using different particle sizes of powder? Any technical information would be helpful with this regard. Many Thanks.
Hi, good question! We currently offer our parts made with 1 particle size. As you can imagine from the process it is hard to run different powders easily and demand for it is very limited.
I could see that making walls thick or thin would change porosity, however we do not have data on that.
If you decide to run tests, let us know and we will definitely share the data with the community.
Pete
Can you tell us a little more about the dying process? I’m especially interested in dying parts in colors not available in the Shapeways store, but haven’t had luck getting the same uniform finish!
We have a (rather old) tutorial on the site: https://www.shapeways.com/tutorials/dyeing_sls
I should have referenced it in my post.
Hi Adam,
You might also like these 2 community topic’s about dyeing models:
https://www.shapeways.com/forum/index.php?t=msg&goto=69895
(great examples!)
https://www.shapeways.com/forum/index.php?t=msg&goto=73514
(Different tests with explanation of the process)
It looks like the community likes using Jacquard dyes 🙂
Cheers,
Mitchell
Thanks, very informative. I liked the draw of 62 pieces packed on the one try – remind me how my wife put dishes into the washing machine. 🙂 Its pretty clear that is very limited to raise productivity and reduce cost until start to print in series, e.g. need to approach another customer segments like Vistaprint did it and became a winner.