
This is the second post in a series of three about Selective Laser Sintering Nylon. You can read the first post here and the third here. In this post I’m going to focus on the challenges we have encountered and some solutions. It would be great to get your thoughts in the comment section, since we want to learn and are always working to improve our processes to better suit the needs of our community!
As you may remember from my first post, which covers the process of 3D printing, checking is the first step and it also presents the biggest challenge. We want to ensure that the final product looks like the design on the computer screen and that we can reliably make it. Within checking we see four main categories of problems: Thin walls, thin wires, disappearing details, and fragile parts.
Let’s talk about thin walls and thin wires first. When the walls of your design are extremely thin or the design has very thin wires (see example below) our 3D printers might not be able to print them. If we find a problem during the checking process, we make screen shots to indicate what the problem is. But, in some cases it is difficult to assess whether there is a problem. Let’s say you’ve designed something like the edge of a wing that gets thinner and thinner. The thick edge of the design might certainly be printable, whereas the thin edge might not be. The only way to know is to try it. Since we like to push what is possible, we sometimes print the design to see whether it looks great or not. If we then find out that the product fails during printing or post-production, we still have to tell you, and this will already be a few days after ordering, which is not great for either of us. Together we have lost time, we lost machine capacity and some powder, but hopefully we learned something.

An example of extremely thin wires 3D printed using Selective Laser Sintering
Another design issue we see is when parts are too fragile. We can’t always predict which product will be strong enough and which product is not strong enough. In this case especially we often take the gamble and 3D print it because we want you to get your product. Sometimes this leads to a suboptimal result or we find out after trying that we simply cannot 3D print the design.
The last challenge in checking is disappearing details. A little car might have an antenna, which looks great on the computer, but the printer can’t make it. A ring might have an engraving (see picture) so small that after printing the engraving is invisible or unreadable. Sometimes these issues are clear and sometimes it’s right on the edge of what’s possible.

Almost unreadable engraving made using Selective Laser Sintering
As a result of all these checking challenges we launched a massive internal effort to make sure we optimize the experience for you, our customers. The effort resulted in new features like “Print It Anyway” and visualization tools. We also refined our internal processes. The result is that we have been able to reduce the amount of rejections in the checking process by a factor of three!! Also, we learned that making sure we clearly communicate to you about our concerns or reasons for rejecting your design helps you a lot.
Print orientation of a product is another challenge. Depending on how the product is placed in the machine the result varies. The most obvious solution is to give the designer the freedom to orient the part, but s/he might not know what is best, and it also limits us in optimizing the packing of the print tray. Reducing optimization causes the printing to be more expensive. Since it totally depends on other parts in the same tray, estimating how much more it costs to fix orientation is very hard or perhaps impossible. Otherwise an increased price to set print orientation would be another solution.
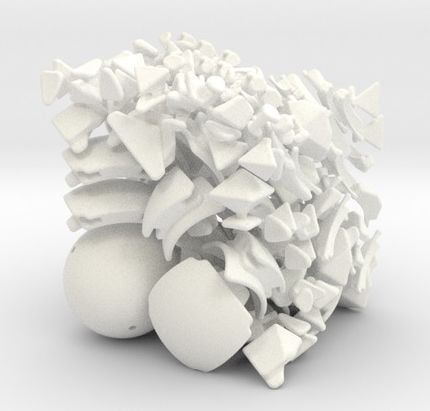
The last topic I would like to address is multiple products in a single file. Since we started Shapeways, we always assumed that a design file would hold one (interlocked) part. This is not always the case in reality and we understand why. How else would you easily make puzzles (see picture below), chess sets and earrings available in your shops or organize them neatly? For us on the other hand, having multiple parts in a single file presents a substantial issue. As you may remember from my first post, we need to sort all parts (and sometimes multiple times). If there are multiple parts in a file (sometimes over 100!) that sorting becomes very hard. We first have to figure out how many parts there are in the file, and then individually separate them if they are all different. Since we have standardized our processes on files this is not easy. One solution is putting all parts in a file into a “sinter box”, a small mesh box around the parts. This makes the sorting super easy, BUT since the box is square and large it is suboptimal to fill trays with. It is much better to put the small parts into other parts than have them sit together in an encased volume. The trade-off here is more work in sorting versus higher machine and material costs. Neither option is great.
Design of twisty puzzle for 3D printing – “Rhomdo Transformer“
Next week in my last post, I will talk about the cost of Selective Laser Sintering. Please let me know what you think by commenting and leave suggestions on what else I should address in next week’s post!
Pete / CEO Shapeways
Back to Graphic Arts & Publishing -they suffer fro the same “print ability” problems. It started when Graphic Designer occupation became commodity, thanks to relatively simple in use S/W.
Where a root of the problem? The Print Design studied in disconnection from printing shop, many designers never been there until started to work. No need to say that with 3D design number of possible mistakes grow exponentially due to number of materials enabled for use, 3rd dimensions and inherent willingness of Designers to take technology to the edges.
So what’s the solution could be?
1. Training. Leading equipment manufacturers create enough learning materials. Its a long way but is a Best one
2. Cooperation with Design S/W manufacturers – they can easily add generic printing modules that send notification for Designer that he built something non printable. It save time & money for Designers and Print shops.
3. Invite Designers and Students to visit 3D print shops -nothing can replace this tangible experience
Until it will be done 3D printing simply does not meet its own value proposition – to be non waste manufacturing
Good Luck Shapeways Team!
Hey Gennady
thanks for sharing and very cool to see that similar problems exist(ed) with 2D printing.
With regards to your solutions
1) Yes, we found that and are still working on it — training obviously never stops as the team grows
2) This is much harder with 3D, especially since all the different technologies have different “print rules”. It would be great to have this and I know Autodesk is thinking about this.
3) We do this all the time. Have a look at our meetup.com/shapeways.
Again thanks,
Pete