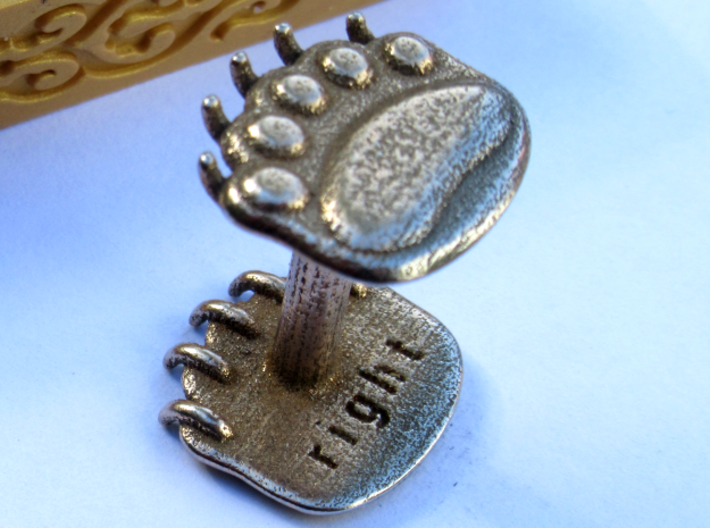
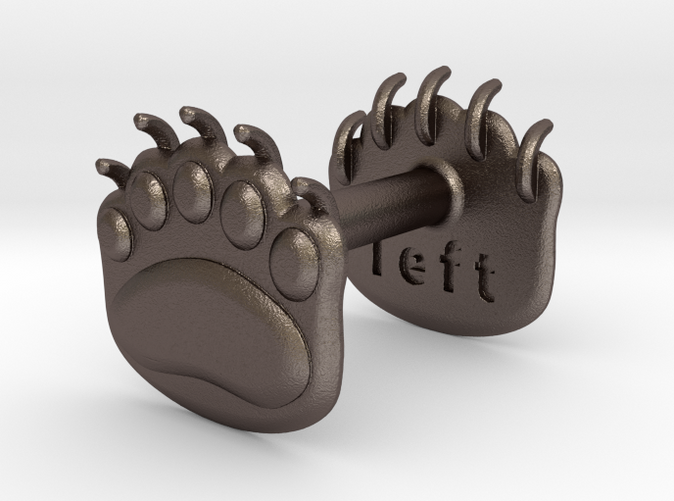
paws are labelled for your convenience


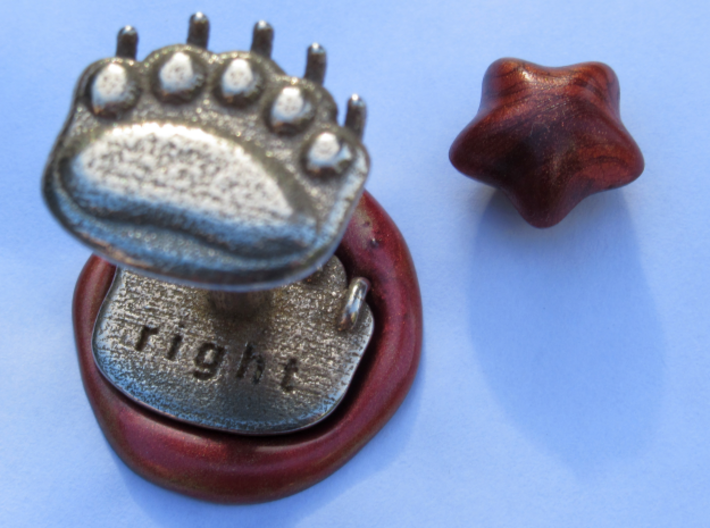


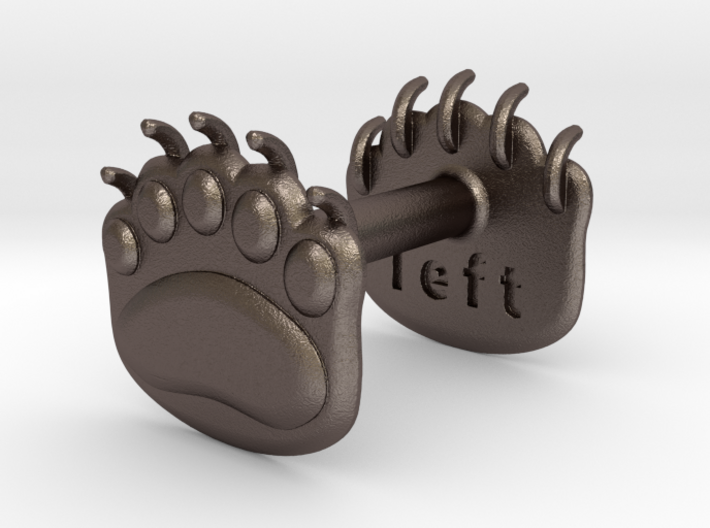
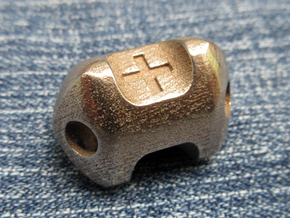
Teddybear clawed-paw wax seal
Made by
Print With Shapeways
 Choose Your Material
 Choose your color and finish
$39.00
Have a question about this product?
contact the designerYou must be logged in and verified to contact the designer.
Product Description
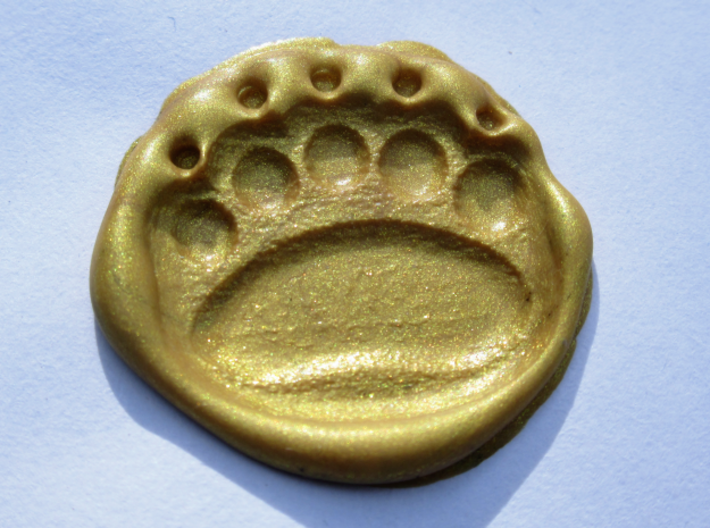
This is a wax seal in the shape of a teddy-bear's paw, with claws.
A version without claws is available: teddy-bear paw wax seal.
Using widely available sealing-wax, you can embellish your documents and seal your envelopes with a small paw-print. You may find other teddy-paw wax seals on the market, but as far as I know, only this one makes an impression like an actual paw would.
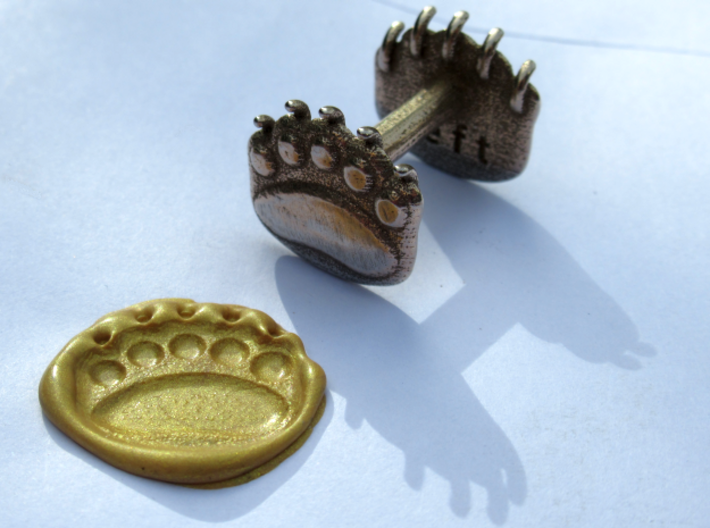
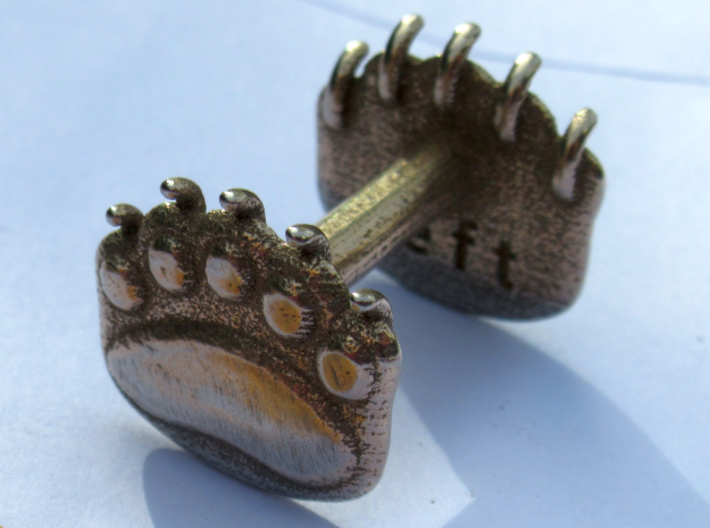
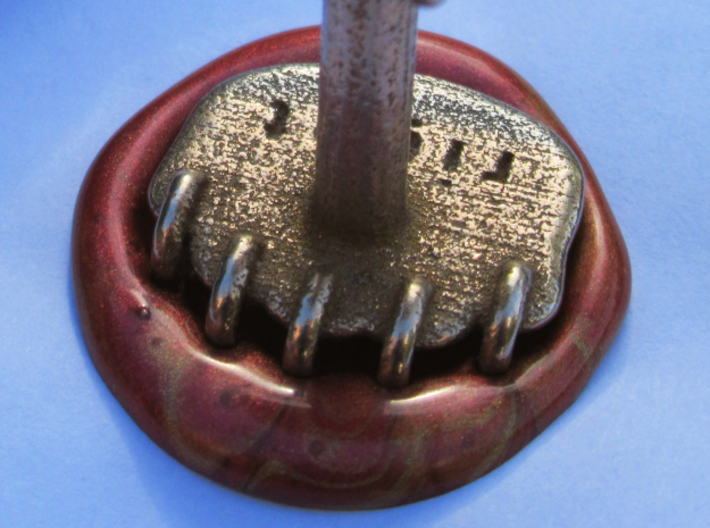
Because this seal is double-headed, you can make both left and right prints, or even a small trail of them. The upper, visible side of each end is labelled with the appropriate paw to make this easier.
To create this design I investigated the world of teddies. It turns out they're quite varied in paw structure, generally having zero, three, four or five finger-pads. After soliciting advice in a very helpful forum of teddy-bear makers, I elected to give my design five pads, which is how many real bears have. I then got a suggestion to try with claws, which is what you see here. This is, however, not a realistic rendering - I very much aimed for the teddy-bear style.
How to use
Sealing wax is widely, and quite cheaply, available online in the form of small sticks, either with or without a wick, and as small beads which can be heated in a spoon over a candle. It may also be available (albeit perhaps less easily and cheaply) in craft or gift shops in your area. Don't try to use normal candle wax.
Which should you use? The wicked wax seems to carry some soot down to the paper, which will then show up in the seal. Some people like that, but if you think not, I recommend the wax beads. You need a little bit more infrastructure - a night-light candle, or similar, and a spoon, but you can get an assortment of colours and make interesting mixes. You can buy special spoons quite easily online, but a tea-spoon will probably suffice (it will get sooty and waxy).
Careful preparation is essential : ensure you are a safe distance away from flammable materials and have a flat, steady surface to work on with safe place to set down your hot wax stick or spoon. It is also probably wise not to do this underneath a fire alarm.
Method 1) If you are using a lump or cut piece of wax in a spoon, light the candle, place the wax to be used in the spoon and hold it just over the candle flame. If you are using wax beads, you will probably need about two beads for the first impression. When completely melted, carefully pour the wax onto the selected area of paper. You can use the side of the spoon spread and stir the wax to get a nice flat puddle of wax. Don't rush - you actually have plenty of time. Put the spoon (caution - still very hot) down to one side - you can carefully wipe it clean with some tissue paper after stamping the seal. If you are making multiple prints, you may be able to use less wax for subsequent prints if you don't clean the spoon in-between.
Alternatively:
Method 2) if you are using a wicked wax stick, light the wick, then hold it horizontally or tilted slightly downward, a few centimetres above the target. Wax will drip down. Your objective now is to get the right amount of wax onto the paper. After enough wax is on the paper, blow out the wax stick. Stir the molten puddle a little with the end, then place it down safely. Don't rush - you actually have a good few seconds.
Now pick up the seal, align it and push it down vertically into position. Hold it in place for 10 seconds or so, then lift it back up vertically. The wax will still be hot and semi-liquid, so don't touch it yet - leave it alone for at least a minute.
Please note
At the end of the manufacturing process, Shapeways polishes the part in tumbling media. In this design there probably won't be much on the stamping faces (although you should check), but there is likely to be some in the left/right text on the back. You can clear out these pieces with a pin or similar implement.
Any bits on the face which you miss often come out onto the wax at the first use. I recommend making a test print before committing to the correspondance you have invested effort in. (If a stone does appear in a print, allow it to cool and set; I found that it may then be carefully removed with a pin, and the impression will look fine.)
A version without claws is available: teddy-bear paw wax seal.
Using widely available sealing-wax, you can embellish your documents and seal your envelopes with a small paw-print. You may find other teddy-paw wax seals on the market, but as far as I know, only this one makes an impression like an actual paw would.
Because this seal is double-headed, you can make both left and right prints, or even a small trail of them. The upper, visible side of each end is labelled with the appropriate paw to make this easier.
To create this design I investigated the world of teddies. It turns out they're quite varied in paw structure, generally having zero, three, four or five finger-pads. After soliciting advice in a very helpful forum of teddy-bear makers, I elected to give my design five pads, which is how many real bears have. I then got a suggestion to try with claws, which is what you see here. This is, however, not a realistic rendering - I very much aimed for the teddy-bear style.
How to use
Sealing wax is widely, and quite cheaply, available online in the form of small sticks, either with or without a wick, and as small beads which can be heated in a spoon over a candle. It may also be available (albeit perhaps less easily and cheaply) in craft or gift shops in your area. Don't try to use normal candle wax.
Which should you use? The wicked wax seems to carry some soot down to the paper, which will then show up in the seal. Some people like that, but if you think not, I recommend the wax beads. You need a little bit more infrastructure - a night-light candle, or similar, and a spoon, but you can get an assortment of colours and make interesting mixes. You can buy special spoons quite easily online, but a tea-spoon will probably suffice (it will get sooty and waxy).
Careful preparation is essential : ensure you are a safe distance away from flammable materials and have a flat, steady surface to work on with safe place to set down your hot wax stick or spoon. It is also probably wise not to do this underneath a fire alarm.
Method 1) If you are using a lump or cut piece of wax in a spoon, light the candle, place the wax to be used in the spoon and hold it just over the candle flame. If you are using wax beads, you will probably need about two beads for the first impression. When completely melted, carefully pour the wax onto the selected area of paper. You can use the side of the spoon spread and stir the wax to get a nice flat puddle of wax. Don't rush - you actually have plenty of time. Put the spoon (caution - still very hot) down to one side - you can carefully wipe it clean with some tissue paper after stamping the seal. If you are making multiple prints, you may be able to use less wax for subsequent prints if you don't clean the spoon in-between.
Alternatively:
Method 2) if you are using a wicked wax stick, light the wick, then hold it horizontally or tilted slightly downward, a few centimetres above the target. Wax will drip down. Your objective now is to get the right amount of wax onto the paper. After enough wax is on the paper, blow out the wax stick. Stir the molten puddle a little with the end, then place it down safely. Don't rush - you actually have a good few seconds.
Now pick up the seal, align it and push it down vertically into position. Hold it in place for 10 seconds or so, then lift it back up vertically. The wax will still be hot and semi-liquid, so don't touch it yet - leave it alone for at least a minute.
Please note
At the end of the manufacturing process, Shapeways polishes the part in tumbling media. In this design there probably won't be much on the stamping faces (although you should check), but there is likely to be some in the left/right text on the back. You can clear out these pieces with a pin or similar implement.
Any bits on the face which you miss often come out onto the wax at the first use. I recommend making a test print before committing to the correspondance you have invested effort in. (If a stone does appear in a print, allow it to cool and set; I found that it may then be carefully removed with a pin, and the impression will look fine.)
Details
What's in the box:
tedclaw_paw1
Dimensions:
Success Rate:
First To try.
What's this?
Rating:
Mature audiences only.

More From This Shop
$39.00
$39.36
$39.00