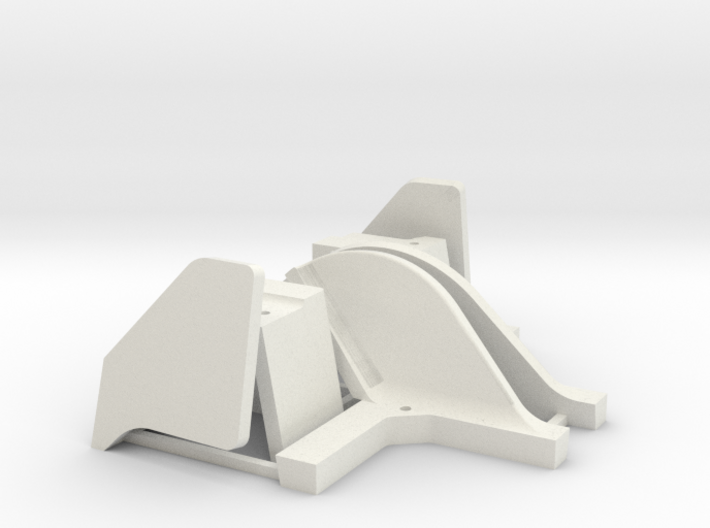
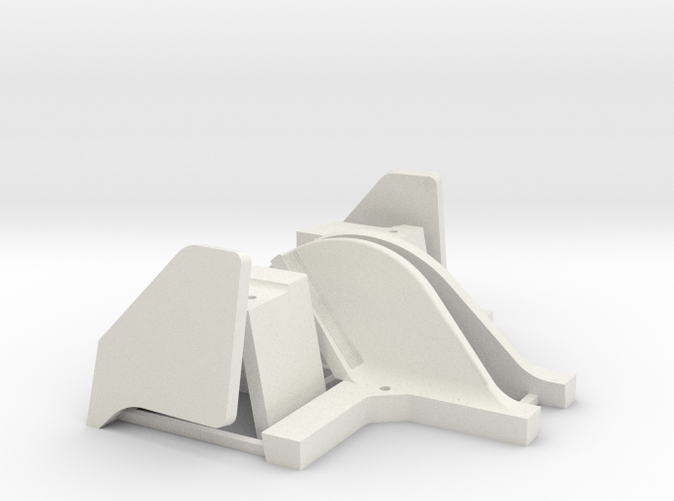
Console Kit as printed


Range Rover Classic Center Console Repair Kit
Made by
Print With Shapeways
 Choose Your Material
 Choose your color and finish
$61.27
Have a question about this product?
contact the designerYou must be logged in and verified to contact the designer.
Product Description
Thank you for your interest in the Cleveland Classic Rovers RRC Center Console Repair and Reinforcement kit. These pieces are custom modeled after a 1992 RRC center console and should fit identically in any of the hard dash classics. They are designed to fit without any modification or trimming required, however, due to slight variation between individual consoles small adjustments may be necessary.
Although this kit may be installed with the console in the vehicle and the box liner removed, it is suggested that you remove the entire console for best surface preparation and positioning of the parts. Note that these will only work if you still have all of the original broken pieces of your console remaining. If a portion of your console is missing please contact me and we can work on another solution.
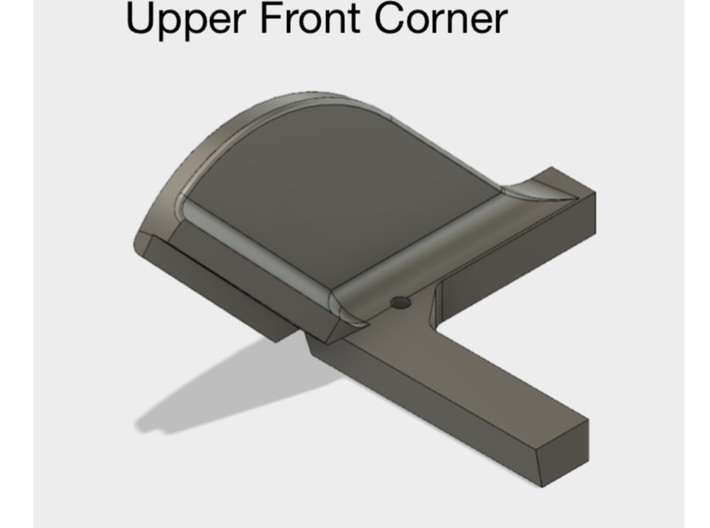
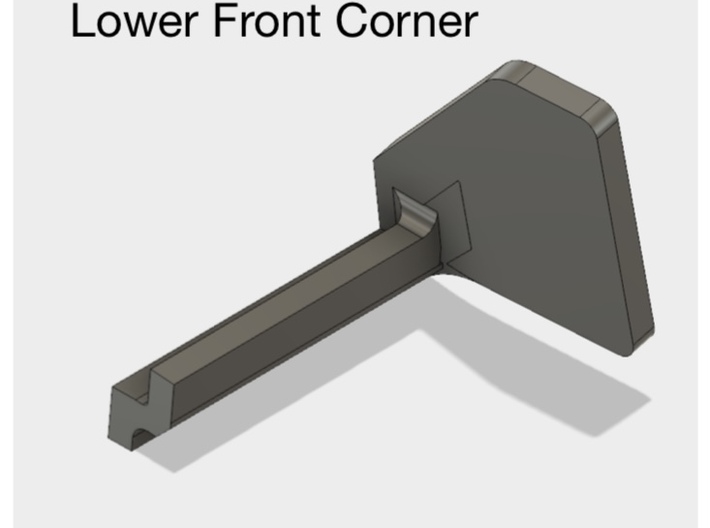
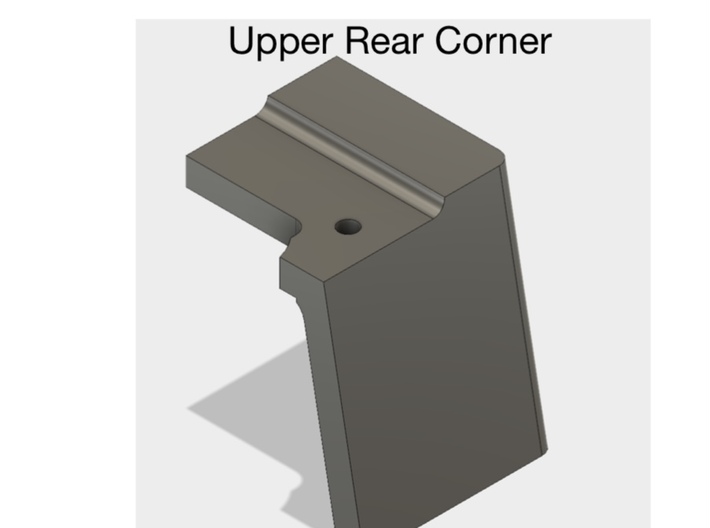
These reinforcement pieces are designed to be epoxied into the current console to bridge and support the high stress-low strength areas where this console frequently breaks over time. Installation is a two phase operation. First, you will glue the broken sections of your console back together in order to regain the original shape and orientation of all the parts. Second, you will epoxy the strengthening pieces into the console to reinforce all of the weak and broken areas.
Installation Instructions:
1.) Start by removing the console, after removing the hinged lid and box liner there are two hex bolts in the bottom of the cubby box area. There are also two #3 Phillips screws underneath the shifter surround. You will have to remove the transfer case knob and shifter knob before gently prying upward on the back edge of the wood shifter panel in order to remove it and access the screws. The screws may be hidden by the black heater hoses. You will also have to remove the clip and pin that attach the parking brake cable to the handle in order to get enough movement on the brake handle to get it out of the way. Pull the leather cover forward and follow the brake cable up from the floor on the inside of the box to find the pin.
2.) After removing the console you will glue all of the broken parts back together. Start by cleaning the inside of the box with denatured alcohol, be sure to pay extra attention to the corner areas that you will be reinforcing. Take time to examine how all broken parts will fit together. Use an activated cyanoacrylate glue such as loctite plastics bonding system No.681925. Follow the directions on the package exactly and use this product to get the pieces of your console back in the proper orientation. Use the glue sparingly and make sure to get the joints exact. This glue is only used to hold parts in place prior to the use of the epoxy.
3.) After the glue sets use 80-grit sandpaper to rough up the support pieces and the mating surfaces of the console. After sanding clean again with denatured alcohol. Test fit the pieces to see if any adjustment is necessary. They should easily go into place as long as the console was glued back together properly in the preparation stages. If any adjustment is required, scraping with a sharp knife or additional sanding will be sufficient. To glue the pieces into the console I suggest a quick setting plastic bonding epoxy such as Loctite Plastic Bonder No.1360788. Mix small batches of epoxy and work with one or two pieces at a time. Small or medium size binder clips work well to clamp the pieces while the epoxy cures.
4.) After installing all six pieces the console should be much more rigid and stronger than when new, with all of the weak points reinforced. The pieces do have a hole molded into them for the box liner screws, however after the epoxy is set you will still have to clean all of the holes out with a drill. Do not try to run a screw into a partially epoxy-filled hole.
5.) Most of the consoles I have seen have had the switch panel mounting screw tabs at the top forward edge of the console broken off. A good solution is to drill two small holes in the wider reinforcement fin in the top cross-piece. One centered to either side of the switch panel locating notch does well. Be sure to drill a pilot hole in your switch panel so you don’t split the wood when putting a screw in the new location.
Although this kit may be installed with the console in the vehicle and the box liner removed, it is suggested that you remove the entire console for best surface preparation and positioning of the parts. Note that these will only work if you still have all of the original broken pieces of your console remaining. If a portion of your console is missing please contact me and we can work on another solution.
These reinforcement pieces are designed to be epoxied into the current console to bridge and support the high stress-low strength areas where this console frequently breaks over time. Installation is a two phase operation. First, you will glue the broken sections of your console back together in order to regain the original shape and orientation of all the parts. Second, you will epoxy the strengthening pieces into the console to reinforce all of the weak and broken areas.
Installation Instructions:
1.) Start by removing the console, after removing the hinged lid and box liner there are two hex bolts in the bottom of the cubby box area. There are also two #3 Phillips screws underneath the shifter surround. You will have to remove the transfer case knob and shifter knob before gently prying upward on the back edge of the wood shifter panel in order to remove it and access the screws. The screws may be hidden by the black heater hoses. You will also have to remove the clip and pin that attach the parking brake cable to the handle in order to get enough movement on the brake handle to get it out of the way. Pull the leather cover forward and follow the brake cable up from the floor on the inside of the box to find the pin.
2.) After removing the console you will glue all of the broken parts back together. Start by cleaning the inside of the box with denatured alcohol, be sure to pay extra attention to the corner areas that you will be reinforcing. Take time to examine how all broken parts will fit together. Use an activated cyanoacrylate glue such as loctite plastics bonding system No.681925. Follow the directions on the package exactly and use this product to get the pieces of your console back in the proper orientation. Use the glue sparingly and make sure to get the joints exact. This glue is only used to hold parts in place prior to the use of the epoxy.
3.) After the glue sets use 80-grit sandpaper to rough up the support pieces and the mating surfaces of the console. After sanding clean again with denatured alcohol. Test fit the pieces to see if any adjustment is necessary. They should easily go into place as long as the console was glued back together properly in the preparation stages. If any adjustment is required, scraping with a sharp knife or additional sanding will be sufficient. To glue the pieces into the console I suggest a quick setting plastic bonding epoxy such as Loctite Plastic Bonder No.1360788. Mix small batches of epoxy and work with one or two pieces at a time. Small or medium size binder clips work well to clamp the pieces while the epoxy cures.
4.) After installing all six pieces the console should be much more rigid and stronger than when new, with all of the weak points reinforced. The pieces do have a hole molded into them for the box liner screws, however after the epoxy is set you will still have to clean all of the holes out with a drill. Do not try to run a screw into a partially epoxy-filled hole.
5.) Most of the consoles I have seen have had the switch panel mounting screw tabs at the top forward edge of the console broken off. A good solution is to drill two small holes in the wider reinforcement fin in the top cross-piece. One centered to either side of the switch panel locating notch does well. Be sure to drill a pilot hole in your switch panel so you don’t split the wood when putting a screw in the new location.
Details
What's in the box:
Console set
Dimensions:
Success Rate:
First To try.
What's this?
Rating:
Mature audiences only.
